#React router dom latest version
Explore tagged Tumblr posts
Visit Tumblr Blog
Explore Tumblr blogs with no restrictions, modern design and the best experience.
Last Seen Tumblr Blogs


Fun Fact
Tumblr was the first site to host the blog for President Barack Obama in 2011.
Text
🚀 From Novice to Pro: Build a Swiggy-Style Food App with React 18

Have you ever dreamed of building a food delivery app like Swiggy or Zomato using the most in-demand frontend library, React? Whether you're a beginner or looking to elevate your frontend development skills, React 18 opens up incredible possibilities—and the best way to master it is by getting hands-on.
Imagine being able to create a real-world food delivery platform, complete with features like dynamic menus, cart functionality, and routing—all from scratch. If that sounds like your jam, you're going to love the journey of learning React through the lens of building a Swiggy-style food app.
And here's the good news: you don’t have to do it alone. With the course Mastering React 18: Build a Swiggy-Style Food App, you’ll get everything you need—step-by-step guidance, real-world coding experience, and modern best practices.
Let’s break down why this is one of the smartest ways to learn React in 2025.
Why React 18 Is Still a Game-Changer in 2025
React has come a long way, but React 18 is where the future starts. With features like automatic batching, concurrent rendering, and the transition API, it brings smoother UI updates and better performance to your applications.
These updates are more than just technical improvements—they directly impact user experience. Whether you’re building a personal project or developing apps for clients, React 18 ensures that your interfaces are responsive, scalable, and lightning-fast.
In other words, learning React 18 gives you a serious edge in today’s frontend job market.
What Makes Building a Food Delivery App So Valuable?
You might wonder: why a food delivery app? Why not just build a to-do list or calculator?
Great question.
Here’s the truth: while basic projects help you learn syntax, real-world projects like a Swiggy-style app teach you how to think like a developer. They help you understand how to:
Structure components effectively
Manage application-wide state
Integrate APIs and fetch dynamic data
Use advanced features like lazy loading, routing, and conditional rendering
Optimize performance and manage code reusability
Plus, let’s be honest—a food app is way more fun to build and show off than a to-do list.
What You’ll Learn in This Course
The course Mastering React 18: Build a Swiggy-Style Food App isn’t just about React basics. It’s about learning to build a complete, fully-functional application that mimics the UX and UI of a real-world platform.
Here’s what you can expect to master:
🔹 Setting Up Your Development Environment
From setting up your folder structure to installing the latest React 18 version, the course walks you through everything. You'll even get hands-on with Vite or Create React App for fast and optimized development.
🔹 Component-Based Architecture
You’ll learn how to break your app into reusable, modular components—like headers, cards, menus, and cart elements—following modern practices.
🔹 Routing & Navigation
React Router DOM makes navigating through your app smooth and dynamic. Learn how to implement routes like Home, Restaurant Details, Checkout, and more.
🔹 State Management
Explore React’s built-in useState and useReducer hooks, and get introduced to state management tools like Redux Toolkit or Context API to manage global states like cart contents or restaurant menus.
🔹 Working with APIs
Discover how to fetch real-time data from mock APIs (or real ones!) and display it dynamically in your app. Learn about useEffect, asynchronous calls, and loading states.
🔹 Optimizing User Experience
Dive into performance tricks—like code splitting, lazy loading, and suspense—to make your app lightning-fast and SEO-friendly.
🔹 Responsive Design
Use CSS-in-JS, Tailwind CSS, or plain CSS to ensure your app looks great on all devices, from smartphones to desktops.
Who Is This Course For?
This course is for:
✅ Beginners who know some JavaScript and want to learn React by doing something practical ✅ Intermediate developers looking to refresh their skills and add a real-world project to their portfolio ✅ Freelancers & job seekers wanting to build portfolio-worthy projects that impress clients and employers
Whether you're aiming to land a job, freelance, or build your own startup, this course equips you with skills that truly matter.
Let’s Talk About Career Benefits 🎯
Once you’ve completed the app, you won’t just know React—you’ll own it. You’ll understand how to architect modern applications that can scale, perform, and delight users.
Employers love developers who:
Can build end-to-end projects
Understand state and data flow
Write clean, reusable code
Know how to debug and optimize
By learning through a real-world project like this food delivery app, you showcase exactly those skills.
Practical Features You’ll Build
To make things even more exciting, here are just some of the features you’ll bring to life in your food app:
🛍️ Cart Management
🍔 Dynamic Menus
📍 Restaurant Listings with Filters
📦 Add to Cart / Remove from Cart Functionality
🔄 Routing and Deep Linking
📲 Responsive Mobile Layout
🌐 SEO and Performance Optimization
By the end, you’ll have a polished app that looks and works like something you’d find on the App Store.
Why This Course Over Others?
There are dozens of React tutorials out there. So why pick this one?
Because it’s goal-oriented, real-world focused, and result-driven. Instead of showing you dry concepts in isolation, it walks you through a real business case: a Swiggy-style food app. It helps you think like a product engineer—not just a coder.
Also, this course is regularly updated, uses modern tooling, and helps you understand the why behind the how. That’s crucial when leveling up.
Learn by Doing: No More Tutorial Hell
The problem with most courses? You watch videos, nod along… and forget it all by the next day.
This course is different.
It encourages active learning. You’ll build the app alongside the instructor, write real code, and solve actual challenges. That’s the secret to mastering React and escaping “tutorial hell.”
Build Confidence Through Action
By the end of this course, you’ll have:
✅ A complete, responsive food delivery app in your portfolio ✅ A clear understanding of how React 18 works under the hood ✅ Real confidence to take on new frontend projects ✅ The ability to contribute to or lead React-based projects
It’s not just about watching someone code. It’s about gaining real experience that sticks.
Bonus: Reusable Codebase for Future Projects
Once you've completed the food app, you can reuse its architecture and logic for future e-commerce platforms, restaurant websites, or client projects. You’ll save time, work smarter, and deliver faster.
In short: you’ll have a strong foundation for your React journey.
Get Started Today
There’s no better time to learn React 18 than right now. The frontend ecosystem is thriving, and skills like these open doors—whether you want to work at a startup, land freelance gigs, or build your own product.
Ready to turn your coding dreams into reality?
👉 Mastering React 18: Build a Swiggy-Style Food App is the ultimate hands-on guide to modern React development.
Start building. Start growing. Start coding like a pro. 🚀
0 notes
Text
Title: The Evolution of Frontend Development: A Comprehensive Guide for Modern Web Developers
Introduction
Frontend development has transformed dramatically over the past decade, becoming one of the most dynamic fields in the tech industry. With user expectations soaring and new technologies emerging, building intuitive, responsive, and user-friendly web interfaces is more crucial than ever. In this article, we’ll dive deep into the core aspects of modern frontend development, the tools and frameworks that shape the industry, and best practices for crafting outstanding user experiences.
What is Frontend Development?
Frontend development, also known as client-side development, refers to the creation of the visual and interactive components of a website or web application. It involves using technologies such as HTML, CSS, and JavaScript to ensure that users can seamlessly interact with a site’s content. Essentially, everything you see and engage with on a website – buttons, text, images, forms, and animations – are the result of frontend development.
The Key Technologies of Frontend Development
1. HTML (HyperText Markup Language)
HTML is the backbone of any website. It structures the content by defining elements such as headings, paragraphs, links, images, and other multimedia. HTML5, the latest version, introduced new elements like <article>, <section>, and <footer>, which have enhanced web accessibility and semantic meaning.
2. CSS (Cascading Style Sheets)
CSS brings HTML to life by defining the visual style of a webpage. From colors and fonts to layouts and animations, CSS allows developers to control how content is presented on different devices. Modern CSS features like Flexbox, Grid, and media queries have made it easier to create responsive designs that adapt to various screen sizes.
3. JavaScript
JavaScript adds interactivity to web pages. Whether it’s creating dynamic content updates, handling user inputs, or adding animations, JavaScript is essential for a responsive and interactive user experience. With the rise of ES6 (ECMAScript 2015) and beyond, JavaScript has become more powerful and easier to work with, especially with features like arrow functions, promises, and async/await.
Modern Frontend Frameworks and Libraries
In today’s development environment, building a web interface purely with vanilla HTML, CSS, and JavaScript is rare. Frameworks and libraries have become indispensable tools for frontend developers, helping streamline workflows, manage complexity, and improve scalability.
1. React
Created by Facebook, React is a JavaScript library for building user interfaces, particularly single-page applications (SPAs). React’s component-based architecture allows developers to break down complex UIs into smaller, reusable pieces. Its virtual DOM efficiently updates only the necessary parts of the UI, resulting in fast rendering performance.
2. Vue.js
Vue.js is a progressive JavaScript framework known for its simplicity and flexibility. It’s ideal for building both SPAs and more traditional multipage applications. Vue’s ecosystem includes tools like Vue Router for routing and Vuex for state management, making it a solid choice for developers looking for a versatile frontend framework.
3. Angular
Angular, maintained by Google, is a comprehensive framework designed for building enterprise-level applications. It provides a full suite of tools, including two-way data binding, dependency injection, and a powerful templating system. Angular is preferred for large-scale applications requiring strict structure and scalability.
4. Svelte
Svelte is a relatively new frontend framework that differs from others by doing most of its work at compile time. Instead of relying on a virtual DOM, Svelte compiles components into highly efficient imperative code that directly manipulates the DOM. This results in faster runtime performance and smaller bundle sizes.
Tools and Platforms Enhancing Frontend Development
1. Figma and Adobe XD
Web design tools like Figma and Adobe XD have become essential for frontend developers. These platforms allow designers and developers to collaborate seamlessly on prototypes and wireframes, ensuring that design vision aligns with the technical execution. They also integrate with AI-driven tools like Locofy and Framer, which convert design assets into code, significantly speeding up the development process.
2. Version Control with Git
Git is a version control system that allows developers to track changes to their codebase, collaborate with other developers, and manage multiple versions of a project. Using platforms like GitHub, GitLab, or Bitbucket, developers can collaborate in teams, review code, and maintain a history of all project changes.
3. Build Tools and Task Runners
Modern frontend development workflows often involve a range of tools that automate repetitive tasks. Tools like Webpack, Gulp, and Parcel help bundle assets, minify JavaScript, compile Sass, and perform live reloading during development. They play a crucial role in optimizing code for production, ensuring faster load times and better user experience.
Best Practices in Frontend Development
1. Responsive Design
With the explosion of mobile device usage, responsive web design is non-negotiable. Using flexible grids, media queries, and fluid images, developers can ensure that websites look great on any device, whether it’s a smartphone, tablet, or desktop.
2. Accessibility
Building websites that are accessible to all users, including those with disabilities, is critical. Following the Web Content Accessibility Guidelines (WCAG), developers should ensure their sites are navigable via keyboard, provide alt text for images, and use semantic HTML to make content readable by screen readers.
3. Performance Optimization
Speed is essential for retaining users and improving search engine rankings. Techniques like lazy loading images, minimizing JavaScript, and using Content Delivery Networks (CDNs) for static assets can drastically improve page load times.
4. Cross-Browser Compatibility
Different browsers may render websites slightly differently. Developers should always test their sites in multiple browsers (e.g., Chrome, Firefox, Safari, Edge) to ensure consistency in appearance and functionality.
Conclusion
Frontend development has evolved into a multifaceted discipline that requires not only technical expertise but also a deep understanding of design principles and user experience. By staying updated with the latest tools, frameworks, and best practices, developers can create stunning, high-performance web interfaces that captivate users and enhance brand engagement. Whether you’re just starting out or are an experienced developer, mastering frontend development is key to building modern, responsive, and accessible web applications.
###blogger.com/blog/post/edit/8905294591021215860/6960074020900498661
1 note
·
View note
Text
Roadmap for react developer
Roadmap for React Developers
Becoming a proficient React developer involves a structured approach to learning various concepts, tools, and libraries. Below is a comprehensive roadmap that outlines the essential steps for both beginners and those looking to advance their skills in React.
1. Foundations Before React
HTML/CSS: Understanding the structure and styling of web pages.
JavaScript: Proficiency in ES6 features such as arrow functions, destructuring, and modules.
Version Control: Familiarity with Git for managing code changes.
2. Core React Concepts
Components: Learn to create functional components using JSX.
Props and State: Understand how to pass data between components and manage component state.
Conditional Rendering: Master rendering different components based on conditions.
3. Core Hooks
useState: Manage state in functional components.
useEffect: Handle side effects like data fetching or subscriptions.
useRef: Access DOM elements directly without causing re-renders.
useContext: Share state across components without prop drilling.
4. Intermediate Concepts
Styling: Use CSS frameworks like TailwindCSS or libraries like styled-components for styling your applications.
Routing: Implement routing in your applications using React Router for multi-page navigation.
Forms Management: Utilize libraries like React Hook Form for handling form inputs and validation.
5. Advanced Topics
State Management: Explore state management solutions such as Redux or Zustand for complex applications.
Data Fetching: Use libraries like TanStack Query for efficient data fetching and caching strategies.
Server-Side Rendering (SSR): Learn about frameworks like Next.js to build full-stack applications with server-rendered pages.
6. Building Projects
Start with simple projects to apply what you've learned, gradually increasing complexity as you gain confidence.
Consider contributing to open-source projects or building portfolio projects that showcase your skills.
7. Continuous Learning
Stay updated with the latest features and best practices in the React ecosystem by following community resources, blogs, and tutorials.
Engage with the community through forums, Discord channels, or local meetups.
By following this roadmap, aspiring React developers can systematically build their skills and knowledge, making them well-equipped to tackle real-world projects and job opportunities in the field of web development[1][2][3].
0 notes
Text
React Router Installation and Configuration
A Comprehensive Guide to React Router: Installation and Configuration
React Router is an essential library for creating dynamic and navigable single-page applications (SPAs) in React. It enables developers to map different URLs to specific components, allowing users to navigate between pages without the need to reload the entire application. In this article, we will cover the installation and basic configuration of React Router, setting you up to create efficient and user-friendly web applications.
1. Why Use React Router?
React Router is widely used in React applications due to its flexibility and powerful features. It allows you to:
Manage Navigation: Seamlessly handle navigation between different components or pages.
Dynamic Routing: Create dynamic routes that respond to user inputs or interactions.
Nested Routes: Organize your application with nested routes, allowing complex UI structures.
Easy Redirection: Implement redirections and conditional rendering based on user actions or authentication status.
2. Installation of React Router
To start using React Router, you first need to install it. React Router has different packages for web and native applications. For web applications, you'll use react-router-dom. Follow these steps to install React Router in your React project:
Install React Router: Open your terminal in the root directory of your React project and run the following command:
npm install react-router-dom
Or if you're using Yarn: yarn add react-router-dom
Update Your React Project: Ensure that your React project is up-to-date with the latest versions of React and React DOM to avoid any compatibility issues.
3. Basic Configuration of React Router
Once installed, you can configure React Router in your application. Here’s how you can set up basic routing:
Import BrowserRouter: In your index.js or App.js file, import BrowserRouter from react-router-dom. This component wraps your entire application and enables routing.
import { BrowserRouter as Router } from 'react-router-dom';
Create Routes: Define your routes within the Router component using Route components. Each Route specifies a path and the component that should render when the path matches the URL.
import { Route, Switch } from 'react-router-dom'; import Home from './components/Home'; import About from './components/About'; function App() { return ( <Router> <Switch> <Route exact path="/" component={Home} /> <Route path="/about" component={About} /> </Switch> </Router> ); }
<Switch>: Ensures that only one route is rendered at a time.
<Route>: Defines individual routes; the exact prop ensures the route only matches the specified path exactly.
Linking Between Routes: To navigate between different routes, use the Link component from react-router-dom instead of traditional anchor tags.
import { Link } from 'react-router-dom'; function Navbar() { return ( <nav> <Link to="/">Home</Link> <Link to="/about">About</Link> </nav> ); }
4. Advanced Configuration
React Router offers advanced configurations, such as nested routes, route parameters, and programmatic navigation.
Nested Routes: To create nested routes, simply nest Route components within each other.
Route Parameters: Use parameters in paths to capture dynamic values from the URL.
Programmatic Navigation: Use the useHistory or useNavigate hooks to navigate programmatically within your components.
5. Conclusion
React Router is a robust tool for managing navigation in React applications. With simple installation and configuration, you can create a fully navigable single-page application. By understanding the basics of routing and how to implement them, you can enhance the user experience and create more dynamic web applications. As you become more familiar with React Router, you can explore its advanced features to further optimize your application’s navigation.
#reactjscourse#job support#react js online training#placement service#reactjs#reactnativecourse#web development#web design
0 notes
Text
Angular Vs. ReactJs Vs. VueJs
The popularity of front-end frameworks is rapidly increasing as they allow developers to build more complex and reliable applications in a minimum time and effort. The web development industry has been transformed by these innovative technologies.
Choosing the right front-end development framework that meets your unique business needs- is a challenging task for every business owner. There are tons of reasons for the pros and cons of each framework, and you'll probably end up back at square one if you try to weigh the pros and cons of each.
Being the oldest front-end framework, Angular is considered the most comprehensive. Or, should you opt for React because React is the most loved framework by many people, and they cannot be wrong at all? Talking about Vue.js, it is younger in the market and going to appear better than the other two.
Well, in this article, we will be talking about the three most popular front-end technologies: Angular, ReactJS, and Vue.js, and we will cover each framework so that you can determine which one best suits your needs.
Let’s get started!
What is Angular?
Angular, developed by Google, was released in 2010 and is a TypeScript-based JavaScript framework. In 2016, Angular 2 (the first release of Angular 2 without the “JS” in its name – AngularJS) represented a shift in positioning and direction from the original AngularJS.
Version 2+ of Angular is just Angular, and although AngularJS (1 version) continues to get updates, we'll talk mainly about Angular, and the most recent version is Angular 13, which was released on November 03, 2021.
There are many top-notch features available with the Angular framework, including control of the user interface, handling user input, validating forms, routing, state management, testing, PWA capabilities, and more. Unlike React, Angular offers a complete collection of framework capabilities.
What is Vue.js?
In 2014, Evan You developed Vue, especially after leaving his job at Google. Although no large company has endorsed Vue, it has seen substantial growth over the past three years.
Contributors for Vue are supported by Patreon, and Vue 3 is currently located in its own GitHub repository; it is run using TypeScript. The current stable version of Vue is 3.0, released in September 2020 (with a few smaller incremental releases since then).
There are more tools in Vue compared to React, but fewer than Angular. It comes with state management and a router but does not offer HTTP client functionality or form validation features.
It makes use of the virtual DOM to ensure faster and bug-free performance. Vue mainly focuses on creating user interfaces and reusable components compared to the other two.
What is React?
Facebook developed React in 2013; React is heavily used by Facebook's products such as Facebook, WhatsApp, and Instagram. The most current stable version is 17.0.2, released in March 2021 and the latest one is also on the headline.
In React, you can create components and subcomponents, which you can think of as UI pieces on a website. One key functionality is building components and subcomponents.
You can also use React to define how your components are rendered and to build SPAs that don't need to refresh the browser, thanks to third-party packages like React Router, a dynamic, non-refreshing routing library.
Overview of Advantages and Limitations
It can be difficult to decide what technology framework to use. The fact is, you cannot pick the best. Each framework has different strengths and weaknesses, so ultimately it depends on your business needs.
There are many factors to consider when choosing a framework, which we will discuss here. However, the most important thing is to choose the framework that you love the most seeing your business's profitability.
Advantages of React JS
A lightweight JS framework with a simple syntax that combines HTML and JavaScript, making it easy to learn. Documentation is readily available, which is a plus for beginners.
Provides excellent support for PWA (progressive web app) especially when you create-react-app templates.
It offers Virtual DOM implementation and rendering optimizations which makes it extremely fast.
Using functional programming with components, react creates modularized code that can be reused, resulting in easier maintenance and scaling. Apps can be developed more easily and scaled with more scalable infrastructure.
Limitations
There have been constant changes in React technology, which makes it a bit challenging to keep up with the latest documentation.
Developers can make design choices freely since React technology is unopinionated.
React utilizes JSX, which creates a learning barrier for some developers, despite its benefits.
Advantages of Angular
Angular makes use of TypeScript, which provides great support for type checking and other external tooling.
Google provides support for Angular, so it can be said that it is a trustworthy framework.
They offer detailed documentation with a huge community, which makes it easier to learn.
Autocomplete is supported inside external HTML templates for components in Angular, allowing for faster development times.
Limitations
There is a slowdown in performance due to the real DOM used, but this can be remedied with the use of ChangeDetectionStrategy, which assists in writing manual code.
Angular offers a comprehensive range of structures including various modules, components, pipes, etc., which makes it hard to learn this framework compared to React and Vue, which mainly rely on the components.
Advantages of Vue.js
Vue comes with detailed documentation, which helps developers overcome their learning curve. With just a basic knowledge of HTML and JavaScript, developers can construct powerful single-page applications.
Vue is used to design robust single-page web applications.
Vue has a smaller footprint, so its speed and flexibility are optimal, which gives better performance compared to other frameworks.
It can be integrated easily with existing infrastructure without having any impact on the system.
Vue uses virtual DOM, which makes it faster than Angular.
Limitations
As a relatively new technology with a tiny market share, Vue has fewer resources than React and Angular, meaning that support and knowledge sharing are less common.
How to Choose the Right Javascript Framework for your Project?
It remains to be answered - when are the three frameworks to be chosen? Which benefits should be exploited to the maximum? We have listed the following criteria that can help you make the right decision regarding the most appropriate platform for your project based on the major advantages and disadvantages of each framework:
Choose Angular:
When you want to create a large and complex project such as building enterprise applications with Angular
When you are looking for simplicity
When you want great reliability and scalability
When you have Angular developers on your team
When you can afford some time to learn TypeScript before the project starts
Choose React:
When your project can accept reusable components
When your project’s front end is not too complex
When your performance and scalability are important
When you are having tight deadlines
When you are looking for relevant experience in React.js development.
Choose Vue.js:
When your project scope is on the small side
When you want superior performance
When you have experienced front-end developers but have team members with JavaScript knowledge
When you are not experienced in learning a new technology
Angular, React, and Vue.js are by no means the only front-end frameworks available. There are a lot of exciting tools that will suit projects of different sizes and complexity.
It shouldn't be hard to put together the right technology stack and deliver a great software solution with the right approach and common sense.
JavaScript-based tools are available along with front-end development frameworks. You can always count on us for any development team you need to hire, such as a React.js developer team for example.
Let’s make a detailed comparison between Angular Vs. ReactJs Vs VueJs one by one:
Angular Vs. ReactJs Vs VueJs: Framework Size
Size matters for development frameworks since size influences application performance. Angular is one of the heaviest in size, with 143k. A framework and its application must be downloaded before an application can be used.
The second most popular framework is React, with a size of 43k, and the lightest framework is Vue.js, with only 23k. Therefore, if your application is not more complex and doesn’t have many sophisticated components, choosing the smaller framework would be the best option.
Angular Vs. ReactJs Vs VueJs: Performance
It is important to know that Web application performance directly depends on the Document Object Model, or DOM, which represents a web page in both the browser and in the source code. The DOM is what allows web pages to be modified during an update process.
When only one item is changed on a web page, Angular updates the entire page and re-renders the whole web page. Regular DOM, particularly in single-page applications, affects performance, making it its Achilles' heel.
As both React and Vue.js make use of virtual DOM, they leave Angular in the dust. Changes can be made in a copy of the DOM without affecting the actual DOM. In addition, just the modified components of the virtual DOM are rerendered, and the updated virtual DOM is compared to a snapshot of the regular DOM. The performance of the application is greatly improved by this approach.
Angular Vs. ReactJs Vs VueJs: Community
React was rated the most popular framework for developers in the 2017 Stack Overflow Developer Survey. The app enjoyed unparalleled popularity and support because it was constructed by the Facebook team. With more than thirty thousand developer members now contributing to React's development, its developer community has now exceeded thirty thousand members.
Traditional users have appreciated the advantages of Angular and the community has been quite supportive. Even with the statistics by Bestof.js showing AngularJS still has a lot more followers than its later versions, the first version of Angular still has many more followers.
Although Vue.js has many advantages, it doesn't appear to be popular with developers despite its advantages. Collaboration on framework functionality improves the framework's functionality and, more importantly, its library collection expands.
The components in React are sure to be reusable since they have been contributed by peers. In other words, React might be your best option if you are looking for community support and ready-made components.
Angular Vs. ReactJs Vs VueJs: Popularity
Google Trends provides little insight into the popularity of "angular" and "react" since they are frequently used terms. However, the number of stars they receive on their GitHub repo is a good barometer of their popularity.
Recently, Vue has been up there with React among the top frameworks. After a sudden drop in stars in mid-2016, it is back on top. Your development team will be able to overcome the shortcomings of these frameworks, regardless of which business framework you use.
If the team is in the right hands, it can be assured that this will happen. Moreover, your developers are experts and understand these frameworks inside and out, so you can always rely on them to deliver the solutions you need.
Or you can hire dedicated developers who are proficient in Vue.js, React, and Angular from a reputable company.
Angular Vs. ReactJs Vs VueJs: Scalability
The ability to maintain an expanding functionality is the essence of scalability as it applies to front-end development. A development platform should be able to support the growth of applications as they grow in size and complexity.
Both Angular and React are easily scalable when it comes to building scalable applications, according to developers almost unanimously. Modular development with Angular provides scalability, while component-based development with React yields excellent results.
Because it uses template-based syntax, Vue.js has a disastrous record when it comes to scalability. It becomes increasingly difficult to reuse templates within a large application, compared with JavaScript components.
Angular Vs. ReactJs Vs VueJs: Learning Curve
It is very subjective that for some people technology A may be easier to learn than technology B; while others may find it difficult to learn. Having mastered JavaScript and understanding its concepts is the first step to learning the front end, so all three should be equally easy for you.
Because Typescript is good to know when writing Angular apps (despite it not being required), it may cause more problems with Angular. React.js and VueJS appear to be more accessible to beginners than other frameworks, according to my research. However, individual preferences play a large role here.
Angular Vs. ReactJs Vs VueJs: User Friendliness
Angular, React, and Vue.js are the three most difficult technologies in that order. As a result, Vue.js has an advantage. It is easy for organizations to hire and onboard experienced JS developers, and also want to make them work seamlessly with Vue.js.
Angular Vs. ReactJs Vs VueJs: Popular Projects
Now we would like to sum up this article with this final point, describing some well-known projects that have utilized each of these frameworks, illustrating that you can accomplish big things no matter what the technology is.
Netflix, Facebook, and Instagram are some of the most popular websites using Angular. React.js powers more popular websites including Forbes, BMW Price calculator, Santander Bank, etc. Some of the leading names like Alibaba, 9GAG, and FontAwesome are powered by Vue.js.
Final thoughts
The major components of these frameworks are under continuous development, and new versions are released regularly as well as maintenance of existing ones. Since all of these frameworks have a high level of support, you can use them all safely. In contrast, Vue - which started more recently but is still growing quickly - is not growing as fast as Angular.
It is impossible to say which frameworks will be relevant in the long run, but each project is backed by a great community, and each is continually evolving. It's important to take a few things into account before jumping into a new framework. First, the expertise of your team can play a big role in choosing a new technology.
Hiring dedicated developers for your project from a leading custom web development company can also help. Lastly, your choice of framework may also be affected by the complexity and scope of the project itself. You can use this information to decide which front-end framework is best for your needs and goals by taking into account all the key differences.
0 notes
Text
React router dom latest version

REACT ROUTER DOM LATEST VERSION UPDATE
REACT ROUTER DOM LATEST VERSION UPGRADE
REACT ROUTER DOM LATEST VERSION UPDATE
React package and browser build no longer includes React DOM, Improved development performance, Fixed occasional test failures, update batchedUpdates API, React Perf, and ReactTestRenderer.create().
REACT ROUTER DOM LATEST VERSION UPGRADE
Improve performance of development builds, Cleanup internal hooks, Upgrade fbjs, Improve startup time of React, Fix memory leak in server rendering, fix React Test Renderer, Change trackedTouchCount invariant into a console.error. Include component stack information, Stop validating props at mount time, Add, Add onLoad handling to and onError handling to element, Add isRunning() API, Fix performance regression.Īdd React.PureComponent, Fix issue with nested server rendering, Add xmlns, xmlnsXlink to support SVG attributes and referrerPolicy to HTML attributes, updates React Perf Add-on, Fixed issue with ref. Initial render now uses document.createElement instead of generating HTML, No more extra s, Improved SVG support, ReactPerf.getLastMeasurements() is opaque, New deprecations introduced with a warning, Fixed multiple small memory leaks, React DOM now supports the cite and profile HTML attributes and cssFloat, gridRow and gridColumn CSS properties.įix a batching bug, Ensure use of the latest object-assign, Fix regression, Remove use of merge utility, Renamed some modules. props access on DOM nodes, Fixed scryRenderedDOMComponentsWithClass, Added react-dom.js. Support for comment nodes ) introduced to deprecate ansferPropsTo, Added support for acceptCharset, classID, manifest HTML attributes, added to API, React.DOM no longer required, Fixed issues with CSS Transitions.ĭeprecated patterns that warned in 0.12 no longer work, ref resolution order has changed, Removed properties this._pendingState and this._rootNodeID, Support ES6 classes, Added API React.findDOMNode(component), Support for iterators and immutable-js sequences, Added new features, deprecated .Īdded support for srcLang, default, kind attributes, and color attribute, Ensured legacy. You can also see the full documentation for recent releases on GitHub. A complete release history for React is given below.
0 notes
Text
Javascript Backend Framework and Features.
Angular

What is Angular?
Angular is a discontinued free and open-source JavaScript-based web framework for developing single-page applications. It was maintained mainly by Google and a community of individuals and corporations.
Latest Version — 14.1.0 / 20 July 2022
Functions Of Angular
Data Binding.
Architecture.
Directives.
Not Browser Specific.
Codeless.
Speed and Performance.
Dependency Injection.
2.React.js

What is React.js?
React (also known as React.js or ReactJS) is a free and open-source front-end JavaScript library for building user interfaces based on UI components. It is maintained by Meta (formerly Facebook) and a community of individual developers and companies. React can be used as a base in the development of single-page, mobile, or server-rendered applications with frameworks like Next.js. However, React is only concerned with state management and rendering that state to the DOM, so creating React applications usually requires the use of additional libraries for routing, as well as certain client-side functionality.
Latest Version — 18.2.0
Features of React.js?
JSX.
Components.
One-way Data Binding.
Virtual DOM.
Simplicity.
Performance.
3.Vue.js

What is Vue.js?
Vue (pronounced /vjuː/, like view) is a JavaScript framework for building user interfaces. It builds on top of standard HTML, CSS, and JavaScript, and provides a declarative and component-based programming model that helps you efficiently develop user interfaces, be it simple or complex.
Latest Version — 3.2.37 / 6 June 2022
Features of Vue.js
Virtual DOM.
Data Binding.
ComponentsFeature of Backbone.js.
Event Handling.
Animation/Transition.
Computed Properties.
Templates.
Directives.
4.Node.js

Node.js is an open-source, cross-platform, back-end JavaScript runtime environment that runs on a JavaScript Engine and executes JavaScript code outside a web browser, which was designed to build scalable network applications
Latest Version —18.9.1 / September 23, 2022
Features of Node.js
Implemented in JavaScript.
Asynchronous Nature.
Event-Driven Architecture.
Single-Threaded Working.
Scalability.
Multiple platform compatibility.
Quick Data Streaming.
Minimum Buffering.
5.Ember.js

What is Ember.js?
Ember.js is an open-source JavaScript web framework that utilizes a component-service pattern. It allows developers to create scalable single-page web applications by incorporating common idioms, best practices, and patterns from other single-page-app ecosystem patterns into the framework.
Latest Version — 4.7.0 / 9 September 2022
Features of Ember.js
Server-side Rendering
Neat Documentation
Two Way data Binding
Nested UI
Build in router
Easy configuration
6.Backbone.js

What is Backbone.js?
Backbone.js is a JavaScript rich-client web app framework based on the model–view–controller design paradigm, intended to connect to an API over a RESTful JSON interface
Feature of Backbone.js
Build in router
Event Binding
Detailed Documentation
Utility Library
Restful Service
Backend Synchronization
Are you looking for a training institute that can help you learn about programming? Look no further than BitCode We offer courses that will teach you everything you need to know about programming, from the basics to more advanced concepts.
Check out our Website and courses today and start learning!
0 notes
Text
Why to upgrade to Angular 2
Introduction of Angular 2
Angular 2 is one of the most popular platforms which are a successor to Google Angular 1 framework. With its help, Angular JS developers can build complex applications in browsers and beyond. Angular 2 is not only the next or advanced version of Angular 1, it is fully redesigned and rewritten. Thus, the architecture of Angular 2 is completely different from Angular 1. This tutorial looks at the various aspects of Angular 2 framework which includes the basics of the framework, the setup of Angular and how to work with the various aspects of the framework. Unlike its predecessor, Angular 2 is a TypeScript-based, web application development platform that makes the switch from MVC (model-view-controller) to a components-based approach to web development.
Benefits of Angular 2
Mobile Support: Though the Ionic framework has always worked well with Angular, the platform offers better mobile support with the version 2. The 1.x version compromised heavily on user experience and application performance in general. With its built-in mobile-orientation, Angular 2.0 is more geared for cross-platform mobile application development.
Faster and Modern Browsers: Faster and modern browsers are demanded by developers today. Developers want Angular 2 stress more on browsers like IE10/11, Chrome, Firefox, Opera & Safari on the desktop and Chrome on Android, Windows Phone 8+, iOS6 & Firefox mobile. Developers believe that this would allow AngularJS codebase to be short and compact and AngularJS would support the latest and greatest features without worrying about backward compatibility and polyfills. This would simplify the AngularJS app development process.
High Performance: Angular2 uses superset of JavaScript which is highly optimized which makes the app and web to load faster. Angular2 loads quickly with component router. It helps in automatic code splitting so user only load code required to vendor the view. Many modules are removed from angular’s core, resulting in better performance means you will be able to pick and choose the part you need.
Changing World of Web: The web has changed noticeably and no doubt it will continue changing in the future as well. The current version of AngularJS cannot work with the new web components like custom elements, HTML imports; shadow DOM etc. which allow developers to create fully encapsulated custom elements. Developers anticipate with all hopes that Angular 2 must fully support all web components.
Component Based Development: A component is an independent software unit that can be composed with the other components to create a software system. Component based web development is pretty much future of web development. Angular2 is focused on component base development. Angularjs require entire stack to be written using angular but angular2 emphasis separation of components /allow segmentation within the app to be written independently. Developers can concentrate on business logic only. These things are not just features but the requirement of any thick-client web framework.
Why to upgrade to Angular 2 ?
Angular 2 is entirely component-based and even the final application is a component of the platform. Components and directives have replaced controllers and scopes. Even the specification for directives has been simplified and will probably further improve. They are the communication channels for components and run in the browser with elements and events. Angular 2 components have their own injector so you no longer have to work with a single injector for the entire application. With an improved dependency injection model, there are more opportunities for component or object-based work.
Optimized for Mobile- Angular 2 has been carefully optimized for boasting improved memory efficiency, enhanced mobile performance, and fewer CPU cycles. It’s as clear of an indication as any that Angular 2 is going to serve as a mobile-first framework in order to encourage the mobile app development process. This version also supports sophisticated touch and gesture events across modern tablet and mobile devices.
Typescript Support- Angular 2 uses Typescript and variety of concepts common in back-end. That is why it is more back-end developer-friendly. It's worth noting that dependency injection container makes use of metadata generated by Typescript. Another important facet is IDE integration is that it makes easier to scale large projects through refactoring your whole code base at the same time. If you are interested in Typescript, the docs are a great place to begin with. Moreover, Typescript usage improves developer experience thanks to good support from text editors and IDE's. With libraries like React already using Typescript, web/mobile app developers can implement the library in their Angular 2 project seamlessly.
Modular Development- Angular 1 created a fair share of headaches when it came to loading modules or deciding between Require.js and Web Pack. Fortunately, these decisions are removed entirely from Angular 2 as the new release shies away from ineffective modules to make room for performance improvements. Angular 2 also integrates System.js, a universal dynamic modular loader, which provides an environment for loading ES6, Common, and AMD modules.
$scope Out, Components in- Angular 2 gets rid of controllers and $scope. You may wonder how you’re going to stitch your homepage together! Well, don’t worry too much − Angular 2 introduces Components as an easier way to build complex web apps and pages. Angular 2 utilizes directives (DOMs) and components (templates). In simple terms, you can build individual component classes that act as isolated parts of your pages. Components then are highly functional and customizable directives that can be configured to build and specify classes, selectors, and views for companion templates. Angular 2 components make it possible to write code that won’t interfere with other pieces of code within the component itself.
Native Mobile Development- The best part about Angular 2 is “it’s more framework-oriented”. This means the code you write for mobile/tablet devices will need to be converted using a framework like Ionic or Native Script. One single skillset and code base can be used to scale and build large architectures of code and with the integration of a framework (like, you guessed it, NativeScript or Ionic); you get a plethora of room to be flexible with the way your native applications function.
Code Syntax Changes- One more notable feature of Angular 2 is that it adds more than a few bells and whistles to the syntax usage. This comprises (but is not limited to) improving data-binding with properties inputs, changing the way routing works, changing an appearance of directives syntax, and, finally, improving the way local variables that are being used widely. One more notable feature of Angular 2 is that it adds more than a few bells and whistles to the syntax usage. This comprises improving data-binding with properties inputs, changing the way routing works, changing an appearance of directives syntax, and, finally, improving the way local variables that are being used widely.
Comparison between Angular 1 and Angular 2
Angular 1
In order to create service use provider, factory, service, constant and value
In order to automatically detection changed use $scope, $watch, $scope, $apply, $timeout.
Syntax event for example ng-click
Syntax properties for example ng-hid, ng-checked
It use Filter
Angular 2
In order to create service use only class
In order to automatically detection changed use Zone.js.
Syntax event for example (click) or (dbl-click)
Syntax properties for example [class: hidden] [checked]
It use pipe
How to migrate Angular 1 to Angular 2
It is a very simple and easy task to upgrade Angular 1 to Angular 2, but this has to be done only if the applications demand it. In this article, I will suggest a number of ways which could be taken into consideration in order to migrate existing applications from Angular 1.x to 2. Therefore, depending on the organizational need, the appropriate migration approach should be used.
Upgrading to Angular 2 is quite an easy step to take, but one that should be made carefully. There are two major ways to feel the taste of Angular 2 in your project. Which you use depends on whatever requirements your project has. The angular team have provided two paths to this:
ngForward
ngForward is not a real upgrade framework for Angular 2 but instead we can use it to create Angular 1 apps that look like Angular 2.
If you still feel uncomfortable upgrading your existing application to Angular 2, you can fall to ngForward to feel the taste and sweetness of the good tidings Angular 2 brings but still remain in your comfort zone.
You can either re-write your angular app gradually to look as if it was written in Angular 2 or add features in an Angular 2 manner leaving the existing project untouched. Another benefit that comes with this is that it prepares you and your team for the future even when you choose to hold onto the past for a little bit longer. I will guide you through a basic setup to use ngForward but in order to be on track, have a look at the Quick Start for Angular 2.
If you took time to review the Quick Start as I suggested, you won't be lost with the configuration. SystemJS is used to load the Angular application after it has been bootstrapped as we will soon see. Finally in our app.ts, we can code like its Angular 2.
ngUpgrade
Writing an Angular 1.x app that looks like Angular 2 is not good enough. We need the real stuff. The challenge then becomes that with a large existing Angular 1.x project, it becomes really difficult to re-write our entire app to Angular 2, and even using ngForward would not be ideal. This is where ngUpgrade comes to our aid. ngUpgrade is the real stuff.
Unlike ngForward, ngUpgrade was covered clearly in the Angular 2 docs. If you fall in the category of developers that will take this path, then spare few minutes and digest this.
We'll also be writing more articles on upgrading to Angular 2 and we'll focus more on ngUpgrade in a future article.
6 notes
·
View notes
Text
IONIC 5- UPDATES
The Ionic Framework team has launched model 5.0.0( Magnesium ) on 11th Feb 2020. This new version centered considerably on material layout recommendations which advanced the UI consists of iOS 13 & Android design, compatibility with multiple frameworks (not best with Angular however now it supports react framework), ionic 5 capabilities consist of remodeled Ionicons, up to date Ionic colorings, new API for growing your very own custom animations, new starter designs, improvements to issue customization, up to date documentation and other enhancements that we can analyze in this article.
How to Update Ionic 4 App to Latest Ionic 5 Version?
For an Angular app
npm install @ionic/angular@latest --save
For a React app
npm install @ionic/react@latest --save npm install @ionic/react-router@latest --save npm install ionicons@latest --save
Top capabilities added in Ionic 5:
iOS Design
The latest version of the Ionic framework has a large section of the updated UI component compatible with IOS 13.Apple recently released its iOS 13 update, in which they up to date the design of many components and accordingly included a few updates to our own, these consist of headers, segments, huge and small titles, and the menu overlay type.
Segment
The ionic crew has absolutely remodeled the iOS Segment layout extensively from its preceding iOS model. With the ionic five design replace, a single indicator is now used to slide between the buttons, checking the only it ends on. Now it makes use of a gesture that may be used to pull the indicator that applies for both Material Design and iOS and some adjustments had been added to support the brand new design.
Header
The header is a root issue of the page that holds the toolbar aspect. Some properties to get a collapsible header and buttons are now available to use.In ionic v4 iOS added the idea of a collapsible header and special sized titles. In Ionic version 5, a few residences are added to the header & name additives to get small titles, shrinking broad claims, and collapsible buttons.
Large Title
The way to do so is to add two headers, one standard-sized above the content and one large-sized inside the content. Other elements, like the search bar in the large header, can also collapse.Ionic v 4 provides a manner to create the collapsible titles that exist on inventory iOS apps. The huge title in iOS collapses right into a default sized title when the content scrolls exceeding a certain point & this setup calls for configuring your IonTitle, IonHeader, and IonButtons elements.
Small Title
The small refers as a header note often used in combination with Swipe to Close Modals. It normally used internal of a toolbar above some other toolbar that contains a standard-sized identify (Additionally, to get the small title styling, ion-name ought to have size="Small".
Swipe to Close Modal
You can now add a modal that remains inset with the page behind it propelled back. A gesture could be used to control swipe to close modal.The Swipe to Close Modals in iOS mode has the capacity to be offered in a card-style and swiped to close mode rather than displaying a modal that covers the whole screen. The card-fashion presentation and swipe to shut gesture want to permit I.e. swipeToClose and imparting element need to be surpassed upon modal creation. Ionic five has includes a gesture to drag the modal down to shut it.
Refresher
The ion-refresher produces pull-to-refresh capability on a content issue & it's pulling icon in iOS has been updated above a header with a huge name. The pull-to-refresh pattern shall we a user pull down on a listing of records the usage of contact to retrieve greater statistics & as you pull down on the content the spinner rotates till the content material is pulled down enough to in which all ticks are seen after which it will start to rotate. IOS refresher in ionic v5 has absolutely redesigned to Material Design refresher.
List Header
ListHeader a header element for a listing and the lists in iOS now grow to be greater massive and bold layout. Comparing ionic v4, the List Header turned into uppercase and small and didn’t have the option for a bottom border. The new lines assets on a List Header permits you to add a border while matching the contemporary design.The Ionic framework official website suggests wrapping all text content of the list header inside an <ion-label>. It is required to support the changes in the List header.
Ionic Animations
Ionic Animations is an open-supply animations software that offers developers the equipment to construct surprisingly performant animations no matter the framework they're using. Ionic Animations is now officially a part of the ionic five.zero launch which makes use of the Web Animations API to build and run all your animations. Web browser time table to run all your animations which offloads essential duties and prioritize optimizations to your animations permitting your animation to run easily as viable which enables you achieve excessive FPS which preserving low CPU makes use of.Ionic 5 ships with the trendy version open-supply icon library Ionicons five, which includes all-new icons for use in web, iOS, Android, and computing device apps.
Ionic Colors
Ionic has nine default colors that may be used to exchange the color of many additives & on the way to alternate the default colorations we have to exchange the coloration characteristic. Ionic 5 up to date with all new colors by using default also to exchange the colours of your Angular or React app builders want to update the subject/variables css manually. Now ionic 5 supports the dark.
Easier Customization
We all know that the additives are not very easy to customize due to following reasonsLack of to be had CSS Variables or way to style internal factors.
Components are being scoped and their Ionic styles taking precedence over custom styles.To make it simpler for builders, ionic team brought assist for extra CSS variables,
transformed some scoped components to Shadow DOM, and commenced adding aid for Shadow Parts.
The following additives were converted to Shadow DOM:
Back Button
Card
Segment
Split Pane
Shadow DOM
An critical element of web components is encapsulation and shadow DOM serves for encapsulation. It lets in a aspect to have its very very own “shadow” DOM tree, that it is markup structure, fashion, and conduct hidden and separate from different code on the web page that can’t be by accident accessed from the primary document and the code may be kept satisfactory and clean.
In addition to that, Shadow DOM permits the use of custom CSS variables inside the issue for less difficult theming. In previous versions, Sass variables have been used to customise and subject an app but that brought on longer construct times but to have more than one themes within the identical app it required developing multiple CSS documents with different Sass variables.
With the growing assist for Shadow Parts in browsers, users could be capable of goal particular elements inside of our components to override their styles directly.
Angular Ivy
One of the biggest improvements to the brand new Angular v9.0 is that Ivy is enabled with the aid of default & for Ionic Angular builders, Ivy support is now completely enabled in Ionic 5. Ivy permits apps to only maintain pieces of the renderer that they require, rather than the whole thing. This approach that our final output may be distinctly smaller, which is better for load performance. The manner the CSS variables are used for targeting the activated, targeted and hover backgrounds have been updated at the following components:
Action Sheet
Back Button
Button
FAB Button
Item
Menu Button
Segment Button
Tab Button
Anchor : The ion-anchor thing has been renamed to ion-router-link Back Button : Converted ion-returned-button to use shadow DOM. Card : Converted ion-card to apply shadow DOM. Header / Footer : The no-border attribute has been renamed to ion-no-border Menu : Removed the main characteristic, use content material-id (for vanilla JS / Vue) and contentId (for Angular / React) instead. Use swipeGesture() in preference to swipeEnable() function Colors : The default Ionic shades have been updated to the following: primary:
#3880ff
secondary:
#3dc2ff
tertiary:
#5260ff
success:
#2dd36f
warning:
#ffc409
danger:
#eb445a
light:
#f4f5f8
medium:
#92949c
dark: #222428 Ionic five features bring a few solid modifications which includes iOS 13 layout updates, a new API for creating custom animations, made over Ionicons, updated Ionic colours, complete assist for Ivy, Angular’s new renderer, new starter designs, Ionic CLI 5 and the assist for React frameworks at the side of the Angular.
Hopefully, Ionic v5 will take the Ionic app improvement to every other degree and will help to develop the cross-platform app that may run on the computer, as PWAs, web, and cell platforms.
We wish these modifications will enhance your build time and productivity on the ionic platform.
The good thing is you don’t need to worry lots about dealing with the updates as the process is simple.
Just ensure to have a examine breaking changes document so that you may want to make adjustments in your app.
We will be happy to answer your questions on designing, developing, and deploying comprehensive enterprise web, mobile apps and customized software solutions that best fit your organization needs. As a reputed Software Solutions Developer we have expertise in providing dedicated remote and outsourced technical resources for software services at very nominal cost. Besides experts in full stacks We also build web solutions, mobile apps and work on system integration, performance enhancement, cloud migrations and big data analytics. Don’t hesitate to
get in touch with us!
0 notes
Text
Angular Vs React: Detailed Comparative Analysis!

Mobile app revenues were recorded to be 365 billion U.S. dollars in 2018 and they are expected to go beyond 935 billion U.S. dollars by the year 2023, as forecasted by Statista, a reputed portal for statistics. Looking at these figures, we can confidently say that the scope for app development has grown at an exponential rate. Millions of entrepreneurs across the globe are investing in mobile app development services like never before!
But the entrepreneurs and business professionals looking for creating a lucrative mobile app might face some hurdles. So, this article talks about one such hurdle and that is technology selection. Narrowing down the topic furthermore, the article discusses Angular and React- the two JavaScript-based technologies, widely used for creating SPAs. This read will provide you a detailed report on these technologies and help you make an informed decision on which one can be a better fit for your app development needs.
A Detailed Comparative Analysis between Angular and React
Technology Developed by:
Angular: Google
React: Facebook
Technology Type:
Angular: Written in JavaScript and is an MVC framework
React: A JavaScript library that has only view in MVC and needs Flux to employ architecture
Background and Reliability:
Angular:
Developed in 2016, Angular is maintained by Google’s team to date. It is a complete framework. Despite being a much younger technology in the market, it is widely used for diverse applications due to its reliability. In 2018, more than 600 apps were created in Google alone like Google Analytics, Google Cloud Platform, and many other apps for different business applications.
React:
React too belongs to a good family and is much older comparatively. It is being supported by Facebook. It was first used in 2012 by Facebook for its News Feed functionality and then made open-source in 2013. Today, React is extensively used in several applications and is considered a stable and reliable technology. React has more than 150,000 stars on GitHub.
Basic Concept:
Angular: Brings JavaScript into HTML, client-side rendering, works with real DOM
React: Brings HTML into JavaScript, server-side rendering, works with virtual DOM
Learning Curve:
Angular:
Learning Angular is quite challenging, especially for beginners, and requires rigorous training.
React
React is comparatively easier to learn and grasp, but when augmented with Redux, it can become difficult for learning.
Latest Version:
Angular: Angular 11, released on Nov 11, 2020
React: React 17.0.1, released on Oct 22, 2020
Installation Time:
Angular: Easy to set up, but at times, can require a longer time for coding which may lead to delayed project deliveries.
React: Though React takes longer to get installed, but once set up, it is considerably faster for delivering applications and other projects.
Features and Functionalities:
Angular:
Angular offers some of the outstanding features and functionalities such as:
dependency injection
class-based components that come with lifecycle hooks
routing using @angular/router
templates using HTML which is an extended version
XSS protection
code splitting options
Ajax requests
lazy loading
component CSS encapsulation
test runner, utilities, and framework for unit-testing
@angular/forms for creating forms
Some of the features like forms, HTTP client, etc. are optional in Angular, but some features like dependency injection are built into the framework’s core and Angular developers need to use them compulsorily.
React:
It comes with JSX instead of classic templates; JSX is an XML-like language developed on top of JavaScript
class-based components
state management functionality
code splitting
lazy loading
tools for unit-testing of components
XSS protection
error reporting and handling with error boundary
React doesn’t offer anything much for routing, dependency handling, advanced form calling, HTTP calls, etc. However, it leverages popular libraries like Fetch for HTTP requests, React-router for routing, React Testing or Enzyme Library for more unit-testing utilities, several techniques for CSS encapsulation, etc.
Significant Tools and Libraries:
Both, Angular and React, have a huge ecosystem of important tools and libraries associated with them to boost the performance of these frameworks.
Angular:
Angular CLI
Component Libraries like Material UI, PrimeNG, ng-bootstrap, NG-ZORRO, Onsen UI for Angular
Angular Universal
Ngx-admin
State Management Libraries such as NGXS, Akita, and NgRx.
Compodoc
Ionic Framework
Augury
Find a more detailed list of Angular tools in our blogs here.
React:
A CLI utility named Create React App
Component Libraries such as ant-design, react-bootstrap, Material UI, Semantic UI, Blueprint, Onsen UI, etc.
Styling Libraries like Emotion, CSS Modules, Styles components, etc.
State Management Libraries such as MobX and Redux
React Native
PropTypes feature
React Admin
Next.js
UI development environments like Storybook, MDX, React Styleguidist, etc.
Gatsby
React developer toolsReact 360
Testing Helpers like Enzyme, built-in TestBed, Testing Library, etc.
Applications Developed:
Angular: Google Analytics, Forbes, Mesh, Firebase Console, Wepay, VMWare, Google Cloud Platform, Auto Trader, Upwork, Google Express, Beam, etc.
React: Uber Technologies, Facebook, Instagram, Pinterest, Netflix, etc.
Wrap-up:
Our article ends with this and we have seen the good and bad of both technologies. There is no winner here, both- Angular and React are apt for certain requirements and business applications. It depends on aspects like features required in the app, app size, budget constraints, skills and size of the team, the platform that you are targeting, when it needs to be out in the market, and several other factors. So, you can decide the best-suited option accordingly.
If you want some expert advice on whether to choose Angular or to go with React app development, contact Biz4Solutions, a renowned React and Angular app development company, based in Frisco, US. We have knowledge of emerging technologies like React, React Native, Angular, Flutter, Xamarin, PHP, .Net, Ionic, Swift, Objective-C, etc. Reach out to us at [email protected] for more details.
To know more about our other core technologies, refer to links below:
Ionic App Development Company
Blockchain app developers
#Angular app development#React developers#Angular developers#Angular app development company#Mobile app development
0 notes
Text
The Next.js Handbook
I wrote this tutorial to help you quickly learn Next.js and get familiar with how it works.
It's ideal for you if you have zero to little knowledge of Next.js, you have used React in the past, and you are looking forward diving more into the React ecosystem, in particular server-side rendering.
I find Next.js an awesome tool to create Web Applications, and at the end of this post I hope you'll be as excited about it as I am. And I hope it will help you learn Next.js!
Note: you can download a PDF / ePub / Mobi version of this tutorial so you can read it offline!
Index
Introduction
The main features provided by Next.js
Next.js vs Gatsby vs create-react-app
How to install Next.js
View source to confirm SSR is working
The app bundles
What's that icon in the bottom right?
Install the React DevTools
Other debugging techniques you can use
Adding a second page to the site
Linking the two pages
Dynamic content with the router
Prefetching
Using the router to detect the active link
Using next/router
Feed data to the components using getInitialProps()
CSS
Populating the head tag with custom tags
Adding a wrapper component
API routes
Run code on the server side, or on the client side
Deploying the production version
Deploying on Now
Analyzing the app bundles
Lazy loading modules
Where to go from here
Introduction
Working on a modern JavaScript application powered by React is awesome until you realize that there are a couple problems related to rendering all the content on the client-side.
First, the page takes longer to become visible to the user, because before the content loads, all the JavaScript must load, and your application needs to run to determine what to show on the page.
Second, if you are building a publicly available website, you have a content SEO issue. Search engines are getting better at running and indexing JavaScript apps, but it's much better if we can send them content instead of letting them figure it out.
The solution to both of those problems is server rendering, also called static pre-rendering.
Next.js is one React framework to do all of this in a very simple way, but it's not limited to this. It's advertised by its creators as a zero-configuration, single-command toolchain for React apps.
It provides a common structure that allows you to easily build a frontend React application, and transparently handles server-side rendering for you.
The main features provided by Next.js
Here is a non-exhaustive list of the main Next.js features:
Hot Code Reloading
Next.js reloads the page when it detects any change saved to disk.
Automatic Routing
Any URL is mapped to the filesystem, to files put in the pages folder, and you don't need any configuration (you have customization options of course).
Single File Components
Using styled-jsx, completely integrated as built by the same team, it's trivial to add styles scoped to the component.
Server Rendering
You can render React components on the server side, before sending the HTML to the client.
Ecosystem Compatibility
Next.js plays well with the rest of the JavaScript, Node, and React ecosystem.
Automatic Code Splitting
Pages are rendered with just the libraries and JavaScript that they need, no more. Instead of generating one single JavaScript file containing all the app code, the app is broken up automatically by Next.js in several different resources.
Loading a page only loads the JavaScript necessary for that particular page.
Next.js does that by analyzing the resources imported.
If only one of your pages imports the Axios library, for example, that specific page will include the library in its bundle.
This ensures your first page load is as fast as it can be, and only future page loads (if they will ever be triggered) will send the JavaScript needed to the client.
There is one notable exception. Frequently used imports are moved into the main JavaScript bundle if they are used in at least half of the site pages.
Prefetching
The Link component, used to link together different pages, supports a prefetch prop which automatically prefetches page resources (including code missing due to code splitting) in the background.
Dynamic Components
You can import JavaScript modules and React Components dynamically.
Static Exports
Using the next export command, Next.js allows you to export a fully static site from your app.
TypeScript Support
Next.js is written in TypeScript and as such comes with an excellent TypeScript support.
Next.js vs Gatsby vs create-react-app
Next.js, Gatsby, and create-react-app are amazing tools we can use to power our applications.
Let's first say what they have in common. They all have React under the hood, powering the entire development experience. They also abstract webpack and all those low level things that we used to configure manually in the good old days.
create-react-app does not help you generate a server-side-rendered app easily. Anything that comes with it (SEO, speed...) is only provided by tools like Next.js and Gatsby.
When is Next.js better than Gatsby?
They can both help with server-side rendering, but in 2 different ways.
The end result using Gatsby is a static site generator, without a server. You build the site, and then you deploy the result of the build process statically on Netlify or another static hosting site.
Next.js provides a backend that can server side render a response to request, allowing you to create a dynamic website, which means you will deploy it on a platform that can run Node.js.
Next.js can generate a static site too, but I would not say it's its main use case.
If my goal was to build a static site, I'd have a hard time choosing and perhaps Gatsby has a better ecosystem of plugins, including many for blogging in particular.
Gatsby is also heavily based on GraphQL, something you might really like or dislike depending on your opinions and needs.
How to install Next.js?
To install Next.js, you need to have Node.js installed.
Make sure that you have the latest version of Node. Check with running node -v in your terminal, and compare it to the latest LTS version listed on https://nodejs.org/.
After you install Node.js, you will have the npm command available into your command line.
If you have any trouble at this stage, I recommend the following tutorials I wrote for you:
Now that you have Node, updated to the latest version, and npm, we're set!
We can choose 2 routes now: using create-next-app or the classic approach which involves installing and setting up a Next app manually.
Using create-next-app
If you're familiar with create-react-app, create-next-app is the same thing - except it creates a Next app instead of a React app, as the name implies.
I assume you have already installed Node.js, which, from version 5.2 (2+ years ago at the time of writing), comes with the npx command bundled. This handy tool lets us download and execute a JavaScript command, and we'll use it like this:
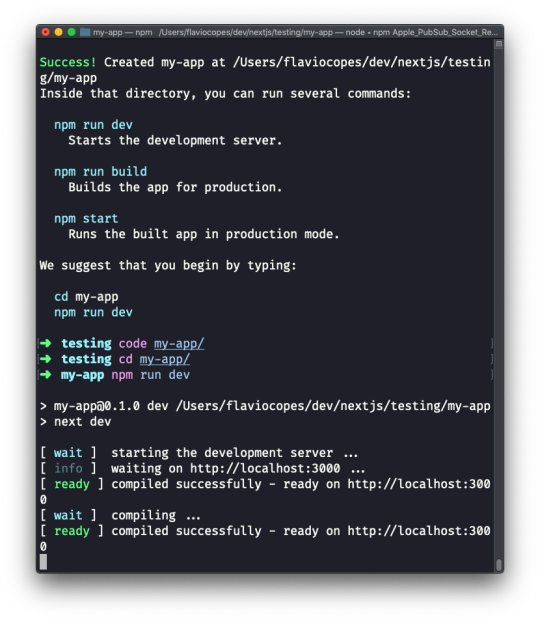
npx create-next-app
The command asks the application name (and creates a new folder for you with that name), then downloads all the packages it needs (react, react-dom, next), sets the package.json to:
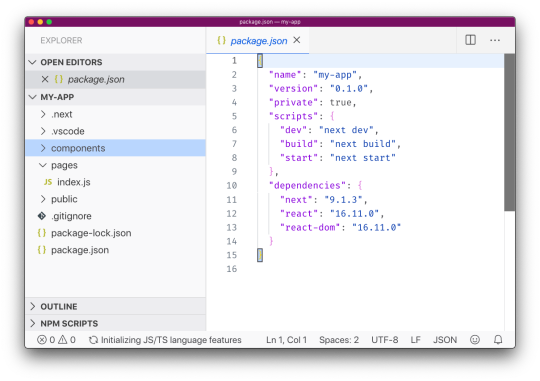
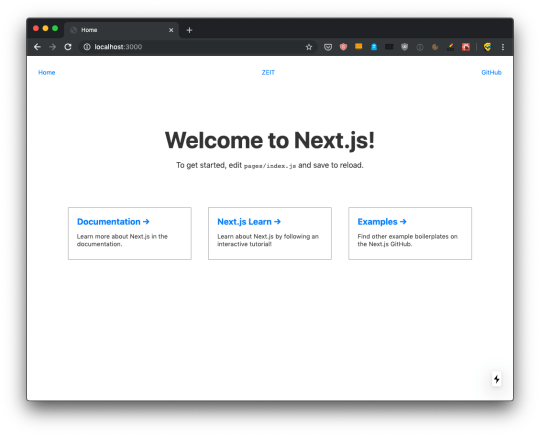
and you can immediately run the sample app by running npm run dev:
And here's the result on http://localhost:3000:
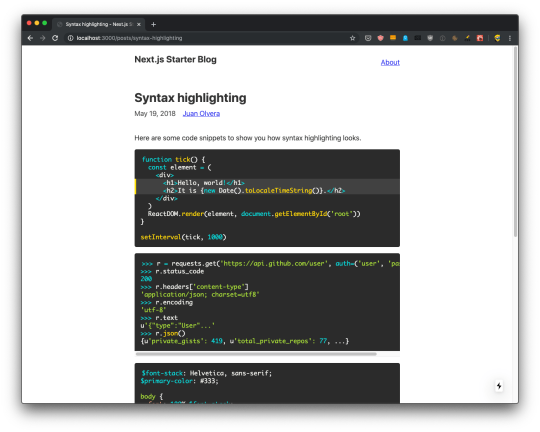
This is the recommended way to start a Next.js application, as it gives you structure and sample code to play with. There's more than just that default sample application; you can use any of the examples stored at https://github.com/zeit/next.js/tree/canary/examples using the --example option. For example try:
npx create-next-app --example blog-starter
Which gives you an immediately usable blog instance with syntax highlighting too:
Manually create a Next.js app
You can avoid create-next-app if you feel like creating a Next app from scratch. Here's how: create an empty folder anywhere you like, for example in your home folder, and go into it:
mkdir nextjs cd nextjs
and create your first Next project directory:
mkdir firstproject cd firstproject
Now use the npm command to initialize it as a Node project:
npm init -y
The -y option tells npm to use the default settings for a project, populating a sample package.json file.

Now install Next and React:
npm install next react react-dom
Your project folder should now have 2 files:
and the node_modules folder.
Open the project folder using your favorite editor. My favorite editor is VS Code. If you have that installed, you can run code . in your terminal to open the current folder in the editor (if the command does not work for you, see this)
Open package.json, which now has this content:
{ "name": "firstproject", "version": "1.0.0", "description": "", "main": "index.js", "scripts": { "test": "echo \"Error: no test specified\" && exit 1" }, "keywords": [], "author": "", "license": "ISC", "dependencies": { "next": "^9.1.2", "react": "^16.11.0", "react-dom": "^16.11.0" } }
and replace the scripts section with:
"scripts": { "dev": "next", "build": "next build", "start": "next start" }
to add the Next.js build commands, which we're going to use soon.
Tip: use "dev": "next -p 3001", to change the port and run, in this example, on port 3001.

Now create a pages folder, and add an index.js file.
In this file, let's create our first React component.
We're going to use it as the default export:
const Index = () => ( <div> <h1>Home page</h1> </div> ) export default Index
Now using the terminal, run npm run dev to start the Next development server.
This will make the app available on port 3000, on localhost.
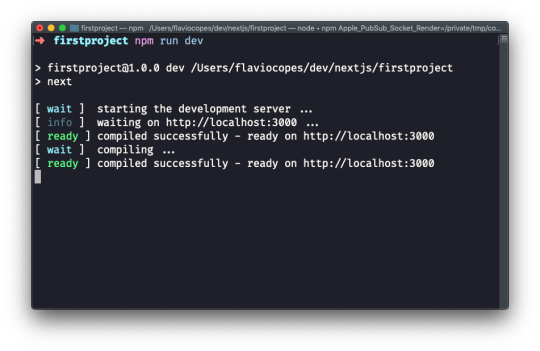
Open http://localhost:3000 in your browser to see it.

View source to confirm SSR is working
Let's now check the application is working as we expect it to work. It's a Next.js app, so it should be server side rendered.
It's one of the main selling points of Next.js: if we create a site using Next.js, the site pages are rendered on the server, which delivers HTML to the browser.
This has 3 major benefits:
The client does not need to instantiate React to render, which makes the site faster to your users.
Search engines will index the pages without needing to run the client-side JavaScript. Something Google started doing, but openly admitted to be a slower process (and you should help Google as much as possible, if you want to rank well).
You can have social media meta tags, useful to add preview images, customize title and description for any of your pages shared on Facebook, Twitter and so on.
Let's view the source of the app. Using Chrome you can right-click anywhere in the page, and press View Page Source.

If you view the source of the page, you'll see the <div><h1>Home page</h1></div> snippet in the HTML body, along with a bunch of JavaScript files - the app bundles.
We don't need to set up anything, SSR (server-side rendering) is already working for us.
The React app will be launched on the client, and will be the one powering interactions like clicking a link, using client-side rendering. But reloading a page will re-load it from the server. And using Next.js there should be no difference in the result inside the browser - a server-rendered page should look exactly like a client-rendered page.
The app bundles
When we viewed the page source, we saw a bunch of JavaScript files being loaded:

Let's start by putting the code in an HTML formatter to get it formatted better, so we humans can get a better chance at understanding it:
<!DOCTYPE html> <html> <head> <meta charSet="utf-8" /> <meta name="viewport" content="width=device-width,minimum-scale=1,initial-scale=1" /> <meta name="next-head-count" content="2" /> <link rel="preload" href="/_next/static/development/pages/index.js?ts=1572863116051" as="script" /> <link rel="preload" href="/_next/static/development/pages/_app.js?ts=1572863116051" as="script" /> <link rel="preload" href="/_next/static/runtime/webpack.js?ts=1572863116051" as="script" /> <link rel="preload" href="/_next/static/runtime/main.js?ts=1572863116051" as="script" /> </head> <body> <div id="__next"> <div> <h1>Home page</h1></div> </div> <script src="/_next/static/development/dll/dll_01ec57fc9b90d43b98a8.js?ts=1572863116051"></script> <script id="__NEXT_DATA__" type="application/json">{"dataManager":"[]","props":{"pageProps":{}},"page":"/","query":{},"buildId":"development","nextExport":true,"autoExport":true}</script> <script async="" data-next-page="/" src="/_next/static/development/pages/index.js?ts=1572863116051"></script> <script async="" data-next-page="/_app" src="/_next/static/development/pages/_app.js?ts=1572863116051"></script> <script src="/_next/static/runtime/webpack.js?ts=1572863116051" async=""></script> <script src="/_next/static/runtime/main.js?ts=1572863116051" async=""></script> </body> </html>
We have 4 JavaScript files being declared to be preloaded in the head, using rel="preload" as="script":
/_next/static/development/pages/index.js (96 LOC)
/_next/static/development/pages/_app.js (5900 LOC)
/_next/static/runtime/webpack.js (939 LOC)
/_next/static/runtime/main.js (12k LOC)
This tells the browser to start loading those files as soon as possible, before the normal rendering flow starts. Without those, scripts would be loaded with an additional delay, and this improves the page loading performance.
Then those 4 files are loaded at the end of the body, along with /_next/static/development/dll/dll_01ec57fc9b90d43b98a8.js (31k LOC), and a JSON snippet that sets some defaults for the page data:
<script id="__NEXT_DATA__" type="application/json"> { "dataManager": "[]", "props": { "pageProps": {} }, "page": "/", "query": {}, "buildId": "development", "nextExport": true, "autoExport": true } </script>
The 4 bundle files loaded are already implementing one feature called code splitting. The index.js file provides the code needed for the index component, which serves the / route, and if we had more pages we'd have more bundles for each page, which will then only be loaded if needed - to provide a more performant load time for the page.
What's that icon on the bottom right?
Did you see that little icon at the bottom right of the page, which looks like a lightning?

If you hover it, it's going to say "Prerendered Page":

This icon, which is only visible in development mode of course, tells you the page qualifies for automatic static optimization, which basically means that it does not depend on data that needs to be fetched at invokation time, and it can be prerendered and built as a static HTML file at build time (when we run npm run build).
Next can determine this by the absence of the getInitialProps() method attached to the page component.
When this is the case, our page can be even faster because it will be served statically as an HTML file rather than going through the Node.js server that generates the HTML output.
Another useful icon that might appear next to it, or instead of it on non-prerendered pages, is a little animated triangle:

This is a compilation indicator, and appears when you save a page and Next.js is compiling the application before hot code reloading kicks in to reload the code in the application automatically.
It's a really nice way to immediately determine if the app has already been compiled and you can test a part of it you're working on.
Next.js is based on React, so one very useful tool we absolutely need to install (if you haven't already) is the React Developer Tools.
Available for both Chrome and Firefox, the React Developer Tools are an essential instrument you can use to inspect a React application.
Now, the React Developer Tools are not specific to Next.js but I want to introduce them because you might not be 100% familiar with all the tools React provides. It's best to go a little into debugging tooling than assuming you already know them.
They provide an inspector that reveals the React components tree that builds your page, and for each component you can go and check the props, the state, hooks, and lots more.
Once you have installed the React Developer Tools, you can open the regular browser devtools (in Chrome, it's right-click in the page, then click Inspect) and you'll find 2 new panels: Components and Profiler.
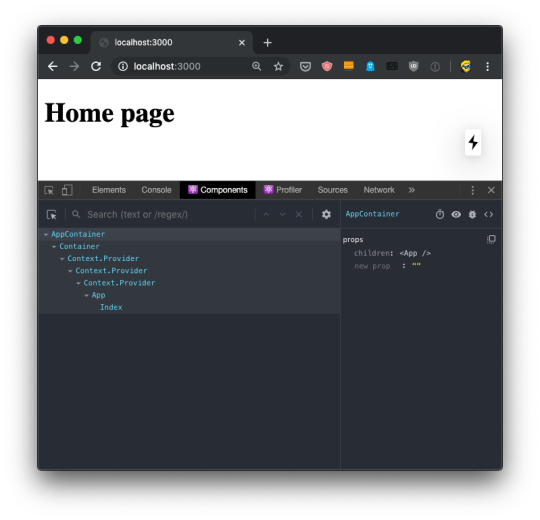
If you move the mouse over the components, you'll see that in the page, the browser will select the parts that are rendered by that component.
If you select any component in the tree, the right panel will show you a reference to the parent component, and the props passed to it:

You can easily navigate by clicking around the component names.
You can click the eye icon in the Developer Tools toolbar to inspect the DOM element, and also if you use the first icon, the one with the mouse icon (which conveniently sits under the similar regular DevTools icon), you can hover an element in the browser UI to directly select the React component that renders it.
You can use the bug icon to log a component data to the console.
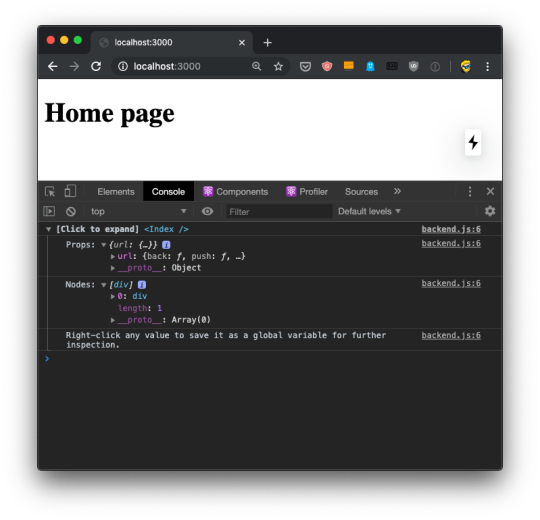
This is pretty awesome because once you have the data printed there, you can right-click any element and press "Store as a global variable". For example here I did it with the url prop, and I was able to inspect it in the console using the temporary variable assigned to it, temp1:

Using Source Maps, which are loaded by Next.js automatically in development mode, from the Components panel we can click the <> code and the DevTools will switch to the Source panel, showing us the component source code:
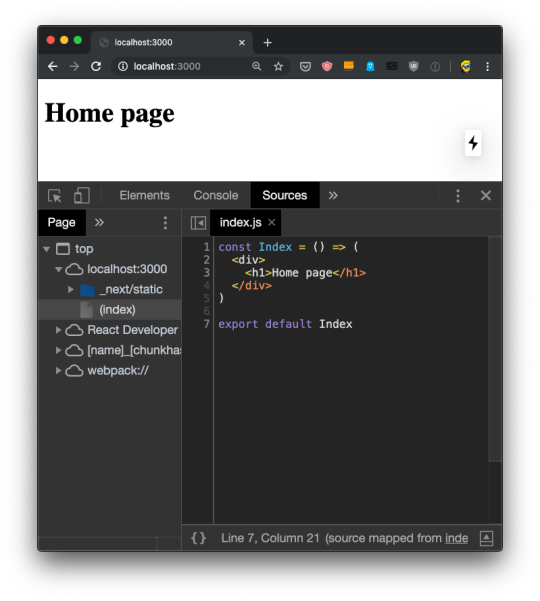
The Profiler tab is even more awesome, if possible. It allows us to record an interaction in the app, and see what happens. I cannot show an example yet, because it needs at least 2 components to create an interaction, and we have just one now. I'll talk about this later.

I showed all screenshots using Chrome, but the React Developer Tools works in the same way in Firefox:

Other debugging techniques you can use
In addition to the React Developer Tools, which are essential to building a Next.js application, I want to emphasize 2 ways to debug Next.js apps.
The first is obviously console.log() and all the other Console API tools. The way Next apps work will make a log statement work in the browser console OR in the terminal where you started Next using npm run dev.
In particular, if the page loads from the server, when you point the URL to it, or you hit the refresh button / cmd/ctrl-R, any console logging happens in the terminal.
Subsequent page transitions that happen by clicking the mouse will make all console logging happen inside the browser.
Just remember if you are surprised by missing logging.
Another tool that is essential is the debugger statement. Adding this statement to a component will pause the browser rendering the page:
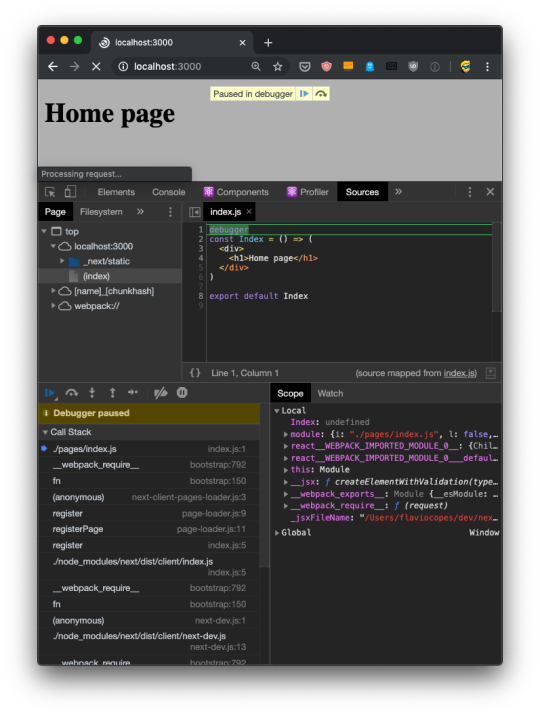
Really awesome because now you can use the browser debugger to inspect values and run your app one line at a time.
You can also use the VS Code debugger to debug server-side code. I mention this technique and this tutorial to set this up.
Adding a second page to the site
Now that we have a good grasp of the tools we can use to help us develop Next.js apps, let's continue from where we left our first app:
I want to add a second page to this website, a blog. It's going to be served into /blog, and for the time being it will just contain a simple static page, just like our first index.js component:

After saving the new file, the npm run dev process already running is already capable of rendering the page, without the need to restart it.
When we hit the URL http://localhost:3000/blog we have the new page:

and here's what the terminal told us:

Now the fact that the URL is /blog depends on just the filename, and its position under the pages folder.
You can create a pages/hey/ho page, and that page will show up on the URL http://localhost:3000/hey/ho.
What does not matter, for the URL purposes, is the component name inside the file.
Try going and viewing the source of the page, when loaded from the server it will list /_next/static/development/pages/blog.js as one of the bundles loaded, and not /_next/static/development/pages/index.js like in the home page. This is because thanks to automatic code splitting we don't need the bundle that serves the home page. Just the bundle that serves the blog page.

We can also just export an anonymous function from blog.js:
export default () => ( <div> <h1>Blog</h1> </div> )
or if you prefer the non-arrow function syntax:
export default function() { return ( <div> <h1>Blog</h1> </div> ) }
Linking the two pages
Now that we have 2 pages, defined by index.js and blog.js, we can introduce links.
Normal HTML links within pages are done using the a tag:
<a href="/blog">Blog</a>
We can't do do that in Next.js.
Why? We technically can, of course, because this is the Web and on the Web things never break (that's why we can still use the <marquee> tag. But one of the main benefits of using Next is that once a page is loaded, transitions to other page are very fast thanks to client-side rendering.
If you use a plain a link:
const Index = () => ( <div> <h1>Home page</h1> <a href='/blog'>Blog</a> </div> ) export default Index
Now open the DevTools, and the Network panel in particular. The first time we load http://localhost:3000/ we get all the page bundles loaded:

Now if you click the "Preserve log" button (to avoid clearing the Network panel), and click the "Blog" link, this is what happens:

We got all that JavaScript from the server, again! But.. we don't need all that JavaScript if we already got it. We'd just need the blog.js page bundle, the only one that's new to the page.
To fix this problem, we use a component provided by Next, called Link.
We import it:
import Link from 'next/link'
and then we use it to wrap our link, like this:
import Link from 'next/link' const Index = () => ( <div> <h1>Home page</h1> <Link href='/blog'> <a>Blog</a> </Link> </div> ) export default Index
Now if you retry the thing we did previously, you'll be able to see that only the blog.js bundle is loaded when we move to the blog page:

and the page loaded so faster than before, the browser usual spinner on the tab didn't even appear. Yet the URL changed, as you can see. This is working seamlessly with the browser History API.
This is client-side rendering in action.
What if you now press the back button? Nothing is being loaded, because the browser still has the old index.js bundle in place, ready to load the /index route. It's all automatic!
Dynamic content with the router
In the previous chapter we saw how to link the home to the blog page.
A blog is a great use case for Next.js, one we'll continue to explore in this chapter by adding blog posts.
Blog posts have a dynamic URL. For example a post titled "Hello World" might have the URL /blog/hello-world. A post titled "My second post" might have the URL /blog/my-second-post.
This content is dynamic, and might be taken from a database, markdown files or more.
Next.js can serve dynamic content based on a dynamic URL.
We create a dynamic URL by creating a dynamic page with the [] syntax.
How? We add a pages/blog/[id].js file. This file will handle all the dynamic URLs under the /blog/ route, like the ones we mentioned above: /blog/hello-world, /blog/my-second-post and more.
In the file name, [id] inside the square brackets means that anything that's dynamic will be put inside the id parameter of the query property of the router.
Ok, that's a bit too many things at once.
What's the router?
The router is a library provided by Next.js.
We import it from next/router:
import { useRouter } from 'next/router'
and once we have useRouter, we instantiate the router object using:
const router = useRouter()
Once we have this router object, we can extract information from it.
In particular we can get the dynamic part of the URL in the [id].js file by accessing router.query.id.
The dynamic part can also just be a portion of the URL, like post-[id].js.
So let's go on and apply all those things in practice.
Create the file pages/blog/[id].js:
import { useRouter } from 'next/router' export default () => { const router = useRouter() return ( <> <h1>Blog post</h1> <p>Post id: {router.query.id}</p> </> ) }
Now if you go to the http://localhost:3000/blog/test router, you should see this:

We can use this id parameter to gather the post from a list of posts. From a database, for example. To keep things simple we'll add a posts.json file in the project root folder:
{ "test": { "title": "test post", "content": "Hey some post content" }, "second": { "title": "second post", "content": "Hey this is the second post content" } }
Now we can import it and lookup the post from the id key:
import { useRouter } from 'next/router' import posts from '../../posts.json' export default () => { const router = useRouter() const post = posts[router.query.id] return ( <> <h1>{post.title}</h1> <p>{post.content}</p> </> ) }
Reloading the page should show us this result:

But it's not! Instead, we get an error in the console, and an error in the browser, too:

Why? Because.. during rendering, when the component is initialized, the data is not there yet. We'll see how to provide the data to the component with getInitialProps in the next lesson.
For now, add a little if (!post) return <p></p> check before returning the JSX:
import { useRouter } from 'next/router' import posts from '../../posts.json' export default () => { const router = useRouter() const post = posts[router.query.id] if (!post) return <p></p> return ( <> <h1>{post.title}</h1> <p>{post.content}</p> </> ) }
Now things should work. Initially the component is rendered without the dynamic router.query.id information. After rendering, Next.js triggers an update with the query value and the page displays the correct information.
And if you view source, there is that empty <p> tag in the HTML:

We'll soon fix this issue that fails to implement SSR and this harms both loading times for our users, SEO and social sharing as we already discussed.
We can complete the blog example by listing those posts in pages/blog.js:
import posts from '../posts.json' const Blog = () => ( <div> <h1>Blog</h1> <ul> {Object.entries(posts).map((value, index) => { return <li key={index}>{value[1].title}</li> })} </ul> </div> ) export default Blog
And we can link them to the individual post pages, by importing Link from next/link and using it inside the posts loop:
import Link from 'next/link' import posts from '../posts.json' const Blog = () => ( <div> <h1>Blog</h1> <ul> {Object.entries(posts).map((value, index) => { return ( <li key={index}> <Link href='/blog/[id]' as={'/blog/' + value[0]}> <a>{value[1].title}</a> </Link> </li> ) })} </ul> </div> ) export default Blog
Prefetching
I mentioned previously how the Link Next.js component can be used to create links between 2 pages, and when you use it, Next.js transparently handles frontend routing for us, so when a user clicks a link, frontend takes care of showing the new page without triggering a new client/server request and response cycle, as it normally happens with web pages.
There's another thing that Next.js does for you when you use Link.
As soon as an element wrapped within <Link> appears in the viewport (which means it's visible to the website user), Next.js prefetches the URL it points to, as long as it's a local link (on your website), making the application super fast to the viewer.
This behavior is only being triggered in production mode (we'll talk about this in-depth later), which means you have to stop the application if you are running it with npm run dev, compile your production bundle with npm run build and run it with npm run start instead.
Using the Network inspector in the DevTools you'll notice that any links above the fold, at page load, start the prefetching as soon as the load event has been fired on your page (triggered when the page is fully loaded, and happens after the DOMContentLoaded event).
Any other Link tag not in the viewport will be prefetched when the user scrolls and it
Prefetching is automatic on high speed connections (Wifi and 3g+ connections, unless the browser sends the Save-Data HTTP Header.
You can opt out from prefetching individual Link instances by setting the prefetch prop to false:
<Link href="/a-link" prefetch={false}> <a>A link</a> </Link>
Using the router to detect the active link
One very important feature when working with links is determining what is the current URL, and in particular assigning a class to the active link, so we can style it differently from the other ones.
This is especially useful in your site header, for example.
The Next.js default Link component offered in next/link does not do this automatically for us.
We can create a Link component ourselves, and we store it in a file Link.js in the Components folder, and import that instead of the default next/link.
In this component, we'll first import React from react, Link from next/link and the useRouter hook from next/router.
Inside the component we determine if the current path name matches the href prop of the component, and if so we append the selected class to the children.
We finally return this children with the updated class, using React.cloneElement():
import React from 'react' import Link from 'next/link' import { useRouter } from 'next/router' export default ({ href, children }) => { const router = useRouter() let className = children.props.className || '' if (router.pathname === href) { className = `${className} selected` } return <Link href={href}>{React.cloneElement(children, { className })}</Link> }
Using next/router
We already saw how to use the Link component to declaratively handle routing in Next.js apps.
It's really handy to manage routing in JSX, but sometimes you need to trigger a routing change programmatically.
In this case, you can access the Next.js Router directly, provided in the next/router package, and call its push() method.
Here's an example of accessing the router:
import { useRouter } from 'next/router' export default () => { const router = useRouter() //... }
Once we get the router object by invoking useRouter(), we can use its methods.
This is the client side router, so methods should only be used in frontend facing code. The easiest way to ensure this is to wrap calls in the useEffect() React hook, or inside componentDidMount() in React stateful components.
The ones you'll likely use the most are push() and prefetch().
push() allows us to programmatically trigger a URL change, in the frontend:
router.push('/login')
prefetch() allows us to programmatically prefetch a URL, useful when we don't have a Link tag which automatically handles prefetching for us:
router.prefetch('/login')
Full example:
import { useRouter } from 'next/router' export default () => { const router = useRouter() useEffect(() => { router.prefetch('/login') }) }
You can also use the router to listen for route change events.
Feed data to the components using getInitialProps
In the previous chapter we had an issue with dynamically generating the post page, because the component required some data up front, and when we tried to get the data from the JSON file:
import { useRouter } from 'next/router' import posts from '../../posts.json' export default () => { const router = useRouter() const post = posts[router.query.id] return ( <> <h1>{post.title}</h1> <p>{post.content}</p> </> ) }
we got this error:
How do we solve this? And how do we make SSR work for dynamic routes?
We must provide the component with props, using a special function called getInitialProps() which is attached to the component.
To do so, first we name the component:
const Post = () => { //... } export default Post
then we add the function to it:
const Post = () => { //... } Post.getInitialProps = () => { //... } export default Post
This function gets an object as its argument, which contains several properties. In particular, the thing we are interested into now is that we get the query object, the one we used previously to get the post id.
So we can get it using the object destructuring syntax:
Post.getInitialProps = ({ query }) => { //... }
Now we can return the post from this function:
Post.getInitialProps = ({ query }) => { return { post: posts[query.id] } }
And we can also remove the import of useRouter, and we get the post from the props property passed to the Post component:
import posts from '../../posts.json' const Post = props => { return ( <div> <h1>{props.post.title}</h1> <p>{props.post.content}</p> </div> ) } Post.getInitialProps = ({ query }) => { return { post: posts[query.id] } } export default Post
Now there will be no error, and SSR will be working as expected, as you can see checking view source:
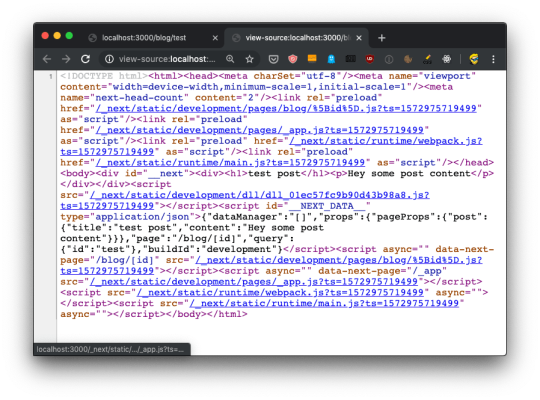
The getInitialProps function will be executed on the server side, but also on the client side, when we navigate to a new page using the Link component as we did.
It's important to note that getInitialProps gets, in the context object it receives, in addition to the query object these other properties:
pathname: the path section of URL
asPath - String of the actual path (including the query) shows in the browser
which in the case of calling http://localhost:3000/blog/test will respectively result to:
And in the case of server side rendering, it will also receive:
req: the HTTP request object
res: the HTTP response object
err: an error object
req and res will be familiar to you if you've done any Node.js coding.
CSS
How do we style React components in Next.js?
We have a lot of freedom, because we can use whatever library we prefer.
But Next.js comes with styled-jsx built-in, because that's a library built by the same people working on Next.js.
And it's a pretty cool library that provides us scoped CSS, which is great for maintainability because the CSS is only affecting the component it's applied to.
I think this is a great approach at writing CSS, without the need to apply additional libraries or preprocessors that add complexity.
To add CSS to a React component in Next.js we insert it inside a snippet in the JSX, which start with
<style jsx>{`
and ends with
`}</style>
Inside this weird blocks we write plain CSS, as we'd do in a .css file:
<style jsx>{` h1 { font-size: 3rem; } `}</style>
You write it inside the JSX, like this:
const Index = () => ( <div> <h1>Home page</h1> <style jsx>{` h1 { font-size: 3rem; } `}</style> </div> ) export default Index
Inside the block we can use interpolation to dynamically change the values. For example here we assume a size prop is being passed by the parent component, and we use it in the styled-jsx block:
const Index = props => ( <div> <h1>Home page</h1> <style jsx>{` h1 { font-size: ${props.size}rem; } `}</style> </div> )
If you want to apply some CSS globally, not scoped to a component, you add the global keyword to the style tag:
<style jsx global>{` body { margin: 0; } `}</style>
If you want to import an external CSS file in a Next.js component, you have to first install @zeit/next-css:
npm install @zeit/next-css
and then create a configuration file in the root of the project, called next.config.js, with this content:
const withCSS = require('@zeit/next-css') module.exports = withCSS()
After restarting the Next app, you can now import CSS like you normally do with JavaScript libraries or components:
import '../style.css'
You can also import a SASS file directly, using the @zeit/next-sass library instead.
From any Next.js page component, you can add information to the page header.
This is handy when:
you want to customize the page title
you want to change a meta tag
How can you do so?
Inside every component you can import the Head component from next/head and include it in your component JSX output:
import Head from 'next/head' const House = props => ( <div> <Head> <title>The page title</title> </Head> {/* the rest of the JSX */} </div> ) export default House
You can add any HTML tag you'd like to appear in the <head> section of the page.
When mounting the component, Next.js will make sure the tags inside Head are added to the heading of the page. Same when unmounting the component, Next.js will take care of removing those tags.
Adding a wrapper component
All the pages on your site look more or less the same. There's a chrome window, a common base layer, and you just want to change what's inside.
There's a nav bar, a sidebar, and then the actual content.
How do you build such system in Next.js?
There are 2 ways. One is using a Higher Order Component, by creating a components/Layout.js component:
export default Page => { return () => ( <div> <nav> <ul>....</ul> </hav> <main> <Page /> </main> </div> ) }
In there we can import separate components for heading and/or sidebar, and we can also add all the CSS we need.
And you use it in every page like this:
import withLayout from '../components/Layout.js' const Page = () => <p>Here's a page!</p> export default withLayout(Page)
But I found this works only for simple cases, where you don't need to call getInitialProps() on a page.
Why?
Because getInitialProps() gets only called on the page component. But if we export the Higher Order Component withLayout() from a page, Page.getInitialProps() is not called. withLayout.getInitialProps() would.
To avoid unnecessarily complicating our codebase, the alternative approach is to use props:
export default props => ( <div> <nav> <ul>....</ul> </hav> <main> {props.content} </main> </div> )
and in our pages now we use it like this:
import Layout from '../components/Layout.js' const Page = () => ( <Layout content={( <p>Here's a page!</p> )} /> )
This approach lets us use getInitialProps() from within our page component, with the only downside of having to write the component JSX inside the content prop:
import Layout from '../components/Layout.js' const Page = () => ( <Layout content={( <p>Here's a page!</p> )} /> ) Page.getInitialProps = ({ query }) => { //... }
API Routes
In addition to creating page routes, which means pages are served to the browser as Web pages, Next.js can create API routes.
This is a very interesting feature because it means that Next.js can be used to create a frontend for data that is stored and retrieved by Next.js itself, transferring JSON via fetch requests.
API routes live under the /pages/api/ folder and are mapped to the /api endpoint.
This feature is very useful when creating applications.
In those routes, we write Node.js code (rather than React code). It's a paradigm shift, you move from the frontend to the backend, but very seamlessly.
Say you have a /pages/api/comments.js file, whose goal is to return the comments of a blog post as JSON.
Say you have a list of comments stored in a comments.json file:
[ { "comment": "First" }, { "comment": "Nice post" } ]
Here's a sample code, which returns to the client the list of comments:
import comments from './comments.json' export default (req, res) => { res.status(200).json(comments) }
It will listen on the /api/comments URL for GET requests, and you can try calling it using your browser:

API routes can also use dynamic routing like pages, use the [] syntax to create a dynamic API route, like /pages/api/comments/[id].js which will retrieve the comments specific to a post id.
Inside the [id].js you can retrieve the id value by looking it up inside the req.query object:
import comments from '../comments.json' export default (req, res) => { res.status(200).json({ post: req.query.id, comments }) }
Heres you can see the above code in action:
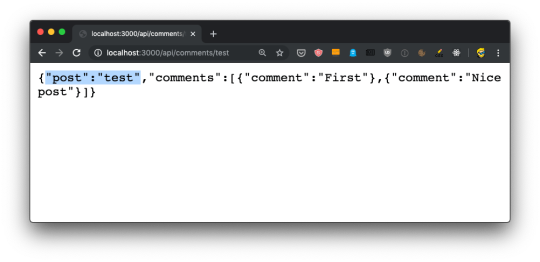
In dynamic pages, you'd need to import useRouter from next/router, then get the router object using const router = useRouter(), and then we'd be able to get the id value using router.query.id.
In the server-side it's all easier, as the query is attached to the request object.
If you do a POST request, all works in the same way - it all goes through that default export.
To separate POST from GET and other HTTP methods (PUT, DELETE), lookup the req.method value:
export default (req, res) => { switch (req.method) { case 'GET': //... break case 'POST': //... break default: res.status(405).end() //Method Not Allowed break } }
In addition to req.query and req.method we already saw, we have access to cookies by referencing req.cookies, the request body in req.body.
Under the hoods, this is all powered by Micro, a library that powers asynchronous HTTP microservices, made by the same team that built Next.js.
You can make use of any Micro middleware in our API routes to add more functionality.
Run code only on the server side or client side
In your page components, you can execute code only in the server-side or on the client-side, by checking the window property.
This property is only existing inside the browser, so you can check
if (typeof window === 'undefined') { }
and add the server-side code in that block.
Similarly, you can execute client-side code only by checking
if (typeof window !== 'undefined') { }
JS Tip: We use the typeof operator here because we can't detect a value to be undefined in other ways. We can't do if (window === undefined) because we'd get a "window is not defined" runtime error
Next.js, as a build-time optimization, also removes the code that uses those checks from bundles. A client-side bundle will not include the content wrapped into a if (typeof window === 'undefined') {} block.
Deploying the production version
Deploying an app is always left last in tutorials.
Here I want to introduce it early, just because it's so easy to deploy a Next.js app that we can dive into it now, and then move on to other more complex topics later on.
Remember in the "How to install Next.js" chapter I told you to add those 3 lines to the package.json script section:
"scripts": { "dev": "next", "build": "next build", "start": "next start" }
We used npm run dev up to now, to call the next command installed locally in node_modules/next/dist/bin/next. This started the development server, which provided us source maps and hot code reloading, two very useful features while debugging.
The same command can be invoked to build the website passing the build flag, by running npm run build. Then, the same command can be used to start the production app passing the start flag, by running npm run start.
Those 2 commands are the ones we must invoke to successfully deploy the production version of our site locally. The production version is highly optimized and does not come with source maps and other things like hot code reloading that would not be beneficial to our end users.
So, let's create a production deploy of our app. Build it using:
npm run build

The output of the command tells us that some routes (/ and /blog are now prerendered as static HTML, while /blog/[id] will be served by the Node.js backend.
Then you can run npm run start to start the production server locally:
npm run start
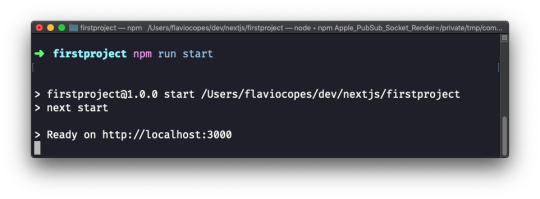
Visiting http://localhost:3000 will show us the production version of the app, locally.
Deploying on Now
In the previous chapter we deployed the Next.js application locally.
How do we deploy it to a real web server, so other people can access it?
One of the most simple ways to deploy a Next application is through the Now platform created by Zeit, the same company that created the Open Source project Next.js. You can use Now to deploy Node.js apps, Static Websites, and much more.
Now makes the deployment and distribution step of an app very, very simple and fast, and in addition to Node.js apps, they also support deploying Go, PHP, Python and other languages.
You can think of it as the "cloud", as you don't really know where your app will be deployed, but you know that you will have a URL where you can reach it.
Now is free to start using, with generous free plan that currently includes 100GB of hosting, 1000 serverless functions invocations per day, 1000 builds per month, 100GB of bandwidth per month, and one CDN location. The pricing page helps get an idea of the costs if you need more.
The best way to start using Now is by using the official Now CLI:
npm install -g now
Once the command is available, run
now login
and the app will ask you for your email.
If you haven't registered already, create an account on https://zeit.co/signup before continuing, then add your email to the CLI client.
Once this is done, from the Next.js project root folder run
now
and the app will be instantly deployed to the Now cloud, and you'll be given the unique app URL:
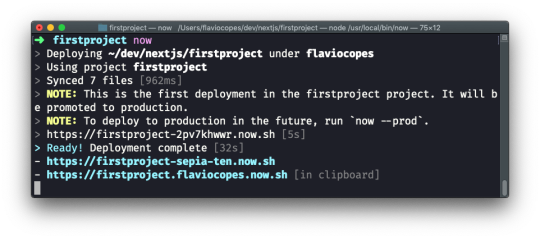
Once you run the now program, the app is deployed to a random URL under the now.sh domain.
We can see 3 different URLs in the output given in the image:
Why so many?
The first is the URL identifying the deploy. Every time we deploy the app, this URL will change.
You can test immediately by changing something in the project code, and running now again:
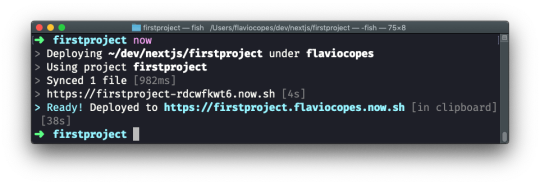
The other 2 URLs will not change. The first is a random one, the second is your project name (which defaults to the current project folder, your account name and then now.sh.
If you visit the URL, you will see the app deployed to production.
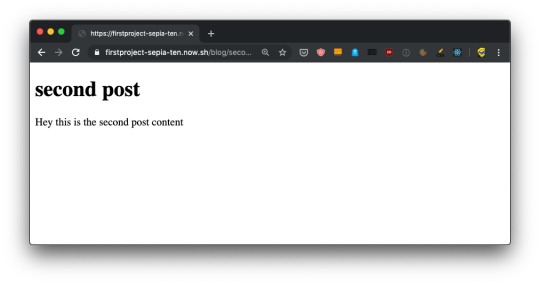
You can configure Now to serve the site to your own custom domain or subdomain, but I will not dive into that right now.
The now.sh subdomain is enough for our testing purposes.
Analyzing the app bundles
Next provides us a way to analyze the code bundles that are generated.
Open the package.json file of the app and in the scripts section add those 3 new commands:
"analyze": "cross-env ANALYZE=true next build", "analyze:server": "cross-env BUNDLE_ANALYZE=server next build", "analyze:browser": "cross-env BUNDLE_ANALYZE=browser next build"
Like this:
{ "name": "firstproject", "version": "1.0.0", "description": "", "main": "index.js", "scripts": { "dev": "next", "build": "next build", "start": "next start", "analyze": "cross-env ANALYZE=true next build", "analyze:server": "cross-env BUNDLE_ANALYZE=server next build", "analyze:browser": "cross-env BUNDLE_ANALYZE=browser next build" }, "keywords": [], "author": "", "license": "ISC", "dependencies": { "next": "^9.1.2", "react": "^16.11.0", "react-dom": "^16.11.0" } }
then install those 2 packages:
npm install --dev cross-env @next/bundle-analyzer
Create a next.config.js file in the project root, with this content:
const withBundleAnalyzer = require('@next/bundle-analyzer')({ enabled: process.env.ANALYZE === 'true' }) module.exports = withBundleAnalyzer({})
Now run the command
npm run analyze

This should open 2 pages in the browser. One for the client bundles, and one for the server bundles:
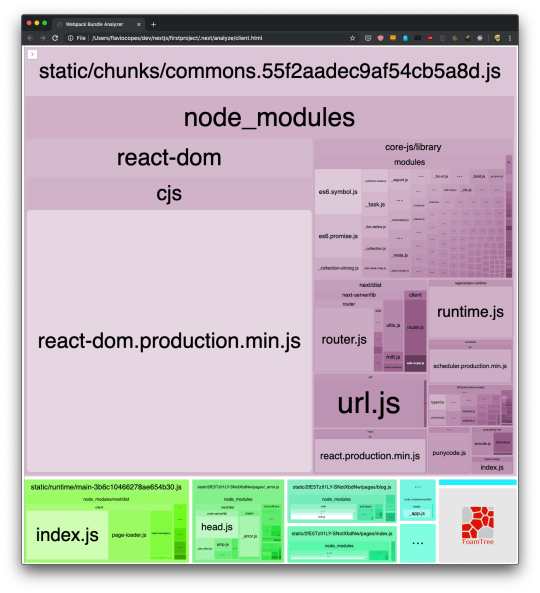

This is incredibly useful. You can inspect what's taking the most space in the bundles, and you can also use the sidebar to exclude bundles, for an easier visualization of the smaller ones:

Lazy loading modules
Being able to visually analyze a bundle is great because we can optimize our application very easily.
Say we need to load the Moment library in our blog posts. Run:
npm install moment
to include it in the project.
Now let's simulate the fact we need it on two different routes: /blog and /blog/[id].
We import it in pages/blog/[id].js:
import moment from 'moment' ... const Post = props => { return ( <div> <h1>{props.post.title}</h1> <p>Published on {moment().format('dddd D MMMM YYYY')}</p> <p>{props.post.content}</p> </div> ) }
I'm just adding today's date, as an example.
This will include Moment.js in the blog post page bundle, as you can see by running npm run analyze:

See that we now have a red entry in /blog/[id], the route that we added Moment.js to!
It went from ~1kB to 350kB, quite a big deal. And this is because the Moment.js library itself is 349kB.
The client bundles visualization now shows us that the bigger bundle is the page one, which before was very little. And 99% of its code is Moment.js.

Every time we load a blog post we are going to have all this code transferred to the client. Which is not ideal.
One fix would be to look for a library with a smaller size, as Moment.js is not known for being lightweight (especially out of the box with all the locales included), but let's assume for the sake of the example that we must use it.
What we can do instead is separating all the Moment code in a separate bundle.
How? Instead of importing Moment at the component level, we perform an async import inside getInitialProps, and we calculate the value to send to the component. Remember that we can't return complex objects inside the getInitialProps() returned object, so we calculate the date inside it:
import posts from '../../posts.json' const Post = props => { return ( <div> <h1>{props.post.title}</h1> <p>Published on {props.date}</p> <p>{props.post.content}</p> </div> ) } Post.getInitialProps = async ({ query }) => { const moment = (await import('moment')).default() return { date: moment.format('dddd D MMMM YYYY'), post: posts[query.id] } } export default Post
See that special call to .default() after await import? It's needed to reference the default export in a dynamic import (see https://v8.dev/features/dynamic-import)
Now if we run npm run analyze again, we can see this:

Our /blog/[id] bundle is again very small, as Moment has been moved to its own bundle file, loaded separately by the browser.
Where to go from here
There is a lot more to know about Next.js. I didn't talk about managing user sessions with login, serverless, managing databases, and so on.
The goal of this Handbook is not to teach you everything, but instead it aims to introduce you, gradually, to all the power of Next.js.
The next step I recommend is to take a good read at the Next.js official documentation to find out more about all the features and functionality I didn't talk about, and take a look at all the additional functionalities introduced by Next.js plugins, some of which are pretty amazing.
You can reach me on Twitter @flaviocopes.
Also check out my website, flaviocopes.com.
Note: you can download a PDF / ePub / Mobi version of this tutorial so you can read it offline!
via freeCodeCamp.org https://ift.tt/2CUTAfk
0 notes
Text
Going Buildless
I'm in a long distance relationship. That means I’m on a plane to England every few weeks, and every time I'm on that plane, I think about how nice it would be to read some Reddit posts. What I could do is find a Reddit app that lets me cache posts for offline (I’m sure there is one out there), or I could take the opportunity to write something myself and have fun using the latest and greatest technologies and web standards out there!
On top of that, there has been a lot of discussion around what I like to call going buildless, which I think is really fascinating development in which production projects are created without using a build process (like a bundler).
This post is also a homage to a couple of awesome people in the web community who are making some great things possible. I'll be linking to all that stuff as we move along. Do note that this won't be a step-by-step tutorial, but if you want to check out the code, you can find the finished project on GitHub.
Our end result should look something like this:

Let's dive in and install a few dependencies
npm i @babel/core babel-loader @babel/preset-env @babel/preset-react webpack webpack-cli react react-dom redux react-redux html-webpack-plugin are-you-tired-yet html-loader webpack-dev-server
I'm kidding.
We're not gonna use any of that.
We're going to try and avoid as much tooling and dependencies as we can to keep the entry barrier low. What we will be using is:
LitElement - LitElement is our component model. It's easy to use, lightweight, close to the metal, and leverages web components.
@vaadin/router - This is a really small (awesome developer experience that I cannot recommend enough.
@pika/web - This will help us get our modules together for easy development.
es-dev-server - This is a simple dev server for modern web development workflows, made by us at open-wc. Although any HTTP server will doc, feel free to bring your own.
That's it! We'll also be using a few browser standards, namely: es modules, web components, import-maps, kv-storage and service-worker.
Let's go ahead and install our dependencies:
npm i -S lit-element @vaadin/router npm i -D @pika/web es-dev-server
We'll also add a postinstall hook to our package.json that's going to run Pika for us:
"scripts": { "start": "es-dev-server", "postinstall": "pika-web" }
🐭 Pika
Pika is a project by Fred K. Schott that aims to bring that nostalgic 2014 simplicity to 2019 web development. Fred is up to all sorts of awesome stuff. For one, he made pika.dev, which lets you easily search for modern JavaScript packages on npm. He also recently gave his talk Reimagining the Registry at DinosaurJS 2019, which I highly recommend you watch.
Pika takes things even one step further. If we run pika-web, it'll install our dependencies as single JavaScript files to a new web_modules/ directory. If your dependency exports an ES "module" entrypoint in its package.json manifest, Pika supports it. If you have any transitive dependencies, Pika will create separate chunks for any shared code among your dependencies.
What this means, is that in our case our output will look something like:
└─ web_modules/ ├─ lit-element.js └─ @vaadin └─ router.js
Sweet! That's it. We have our dependencies ready to go as single JavaScript module files, and this is going to make things really convenient for us later on in this post, so stay tuned!
📥 Import maps
Alright! Now that we've got our dependencies sorted out, let's get to work. We'll make an index.html that'll look something like this:
<html> <!-- head, etc. --> <body> <reddit-pwa-app></reddit-pwa-app> <script src="./src/reddit-pwa-app.js" type="module"></script> </body> </html>
And reddit-pwa-app.js:
import { LitElement, html } from 'lit-element'; class RedditPwaApp extends LitElement { // ... render() { return html` <h1>Hello world!</h1> `; } } customElements.define('reddit-pwa-app', RedditPwaApp);
We're off to a great start. Let's try and see how this looks in the browser so far, so lets start our server, open the browser and... What's this? An error?

Oh boy.
And we've barely even started. Alright, let's take a look. The problem here is that our module specifiers are bare. They are bare module specifiers. What this means is that there are no paths specified, no file extensions, they're just... pretty bare. Our browser has no idea on what to do with this, so it'll throw an error.
import { LitElement, html } from 'lit-element'; // <-- bare module specifier import { Router } from '@vaadin/router'; // <-- bare module specifier import { foo } from './bar.js'; // <-- not bare! import { html } from 'https://unpkg.com/lit-html'; // <-- not bare!
Naturally, we could use some tools for this, like webpack, or rollup, or a dev server that rewrites the bare module specifiers to something meaningful to browsers, so we can load our imports. But that means we have to bring in a bunch of tooling, dive into configuration, and we're trying to stay minimal here. We just want to write code! In order to solve this, we're going to take a look at import maps.
Import maps is a new proposal that lets you control the behavior of JavaScript imports. Using an import map, we can control what URLs get fetched by JavaScript import statements and import() expressions, and allows this mapping to be reused in non-import contexts. This is great for several reasons:
It allows our bare module specifiers to work.
It provides a fallback resolution so that import $ from "jquery"; can try to go to a CDN first, but fall back to a local version if the CDN server is down.
It enables polyfilling of (or other control over) built-in modules. (More on that later, hang on tight!)
Solves the nested dependency problem. (Go read that blog!)
Sounds pretty sweet, no? Import maps are currently available in Chrome 75+ behind a flag, and with that knowledge in mind, let's go to our index.html, and add an import map to our <head>:
<head> <script type="importmap"> { "imports": { "@vaadin/router": "/web_modules/@vaadin/router.js", "lit-element": "/web_modules/lit-element.js" } } </script> </head>
If we go back to our browser, and refresh our page, we'll have no more errors, and we should see our <h1>Hello world!</h1> on our screen.
Import maps is an incredibly interesting new standard, and definitely something you should be keeping your eyes on. If you're interested in experimenting with them, and generate your own import map based on a yarn.lock file, you can try our open-wc import-maps-generate package and play around. Im really excited to see what people will develop in combination with import maps.
📡 Service Worker
Alright, we're going to skip ahead in time a little bit. We've got our dependencies working, we have our router set up, and we've done some API calls to get the data from Reddit and display it on our screen. Going over all of the code is a bit out of scope for this post, but remember that you can find all the code in the GitHub repo if you want to read the implementation details.
Since we're making this app so we can read reddit threads on the airplane it would be great if our application worked offline, and if we could somehow save some posts to read.

Service workers are a kind of JavaScript Worker that runs in the background. You can visualize it as sitting in between the web page, and the network. Whenever your web page makes a request, it goes through the service worker first. This means that we can intercept the request, and do stuff with it! For example, we can let the request go through to the network to get a response, and cache it when it returns so we can use that cached data later when we might be offline. We can also use a service worker to precache our assets. What this means is that we can precache any critical assets our application may need in order to work offline. If we have no network connection, we can simply fall back to the assets we cached, and still have a working (albeit offline) application.
If you're interested in learning more about Progressive Web Apps and service worker, I highly recommend you read The Offline Cookbook, by Jake Archibald, as well as this video tutorial series by Jad Joubran.
Let's go ahead and implement a service worker. In our index.html, we'll add the following snippet:
<script> if ('serviceWorker' in navigator) { window.addEventListener('load', () => { navigator.serviceWorker.register('./sw.js').then(() => { console.log('ServiceWorker registered!'); }, (err) => { console.log('ServiceWorker registration failed: ', err); }); }); } </script>
We'll also add a sw.js file to the root of our project. So we're about to precache the assets of our app, and this is where Pika just made life really easy for us. If you'll take a look at the install handler in the service worker file:
self.addEventListener('install', (event) => { event.waitUntil( caches.open(CACHENAME).then((cache) => { return cache.addAll([ '/', './web_modules/lit-element.js', './web_modules/@vaadin/router.js', './src/reddit-pwa-app.js', './src/reddit-pwa-comment.js', './src/reddit-pwa-search.js', './src/reddit-pwa-subreddit.js', './src/reddit-pwa-thread.js', './src/utils.js', ]); }) ); });
You'll find that we're totally in control of our assets, and we have a nice, clean list of files we need in order to work offline.
📴 Going offline
Right. Now that we've cached our assets to work offline, it would be excellent if we could actually save some posts that we can read while offline. There are many ways that lead to Rome, but since we're living on the edge a little bit, we're going to go with: Kv-storage!
📦 Built-in Modules
There are a few things to talk about here. Kv-storage is a built-in module. Built-in modules are very similar to regular JavaScript modules, except they ship with the browser. It's good to note that while built-in modules ship with the browser, they are not exposed on the global scope, and are namespaced with std: (Yes, really.). This has a few advantages: they won't add any overhead to starting up a new JavaScript runtime context (e.g. a new tab, worker, or service worker), and they won't consume any memory or CPU unless they're actually imported, as well as avoid naming collisions with existing code.
Another interesting, if not somewhat controversial, proposal as a built-in module is the std-toast element, and the std-switch element.
🗃 Kv-storage
Alright, with that out of the way, lets talk about kv-storage. Kv-storage (or "key value storage") is layered on top of IndexedDB and fairly similar to localStorage, except for only a few major differences.
The motivation for kv-storage is that localStorage is synchronous, which can lead to bad performance and syncing issues. It's also limited exclusively to String key/value pairs. The alternative, IndexedDB, is... hard to use. The reason it's so hard to use is that it predates promises, and this leads to a, well, pretty bad developer experience. Not fun. Kv-storage, however, is a lot of fun, asynchronous, and easy to use! Consider the following example:
import { storage, /* StorageArea */ } from "std:kv-storage"; (async () => { await storage.set("mycat", "Tom"); console.log(await storage.get("mycat")); // Tom })();
Notice how we're importing from std:kv-storage? This import specifier is bare as well, but in this case it's okay because it actually ships with the browser.
Pretty neat. We can perfectly use this for adding a 'save for offline' button, and simply store the JSON data for a Reddit thread, and get it when we need it.
// reddit-pwa-thread.js:52: const savedPosts = new StorageArea("saved-posts"); // ... async saveForOffline() { await savedPosts.set(this.location.params.id, this.thread); // id of the post + thread as json this.isPostSaved = true; }
So now if we click the “save for offline" button, and we go to the DevTools “Application" tab, we can see a kv-storage:saved-posts that holds the JSON data for this post:
And if we go back to our search page, we'll have a list of saved posts with the post we just saved:

🔮 Polyfilling
Excellent. However, we're about to run into another problem here. Living on the edge is fun, but also dangerous. The problem that we're hitting here is that, at the time of writing, kv-storage is only implemented in Chrome behind a flag. That's not great. Fortunately, there's a polyfill available, and at the same time we get to show off yet another really useful feature of import-maps; polyfilling!
First things first, lets install the kv-storage-polyfill:
npm i -S kv-storage-polyfill
Note that our postinstall hook will run Pika for us again.
Let’s also add the following to our import map in our index.html:
<script type="importmap"> { "imports": { "@vaadin/router": "/web_modules/@vaadin/router.js", "lit-element": "/web_modules/lit-element.js", "/web_modules/kv-storage-polyfill.js": [ "std:kv-storage", "/web_modules/kv-storage-polyfill.js" ] } } </script>
What happens here is that whenever /web_modules/kv-storage-polyfill.js is requested or imported, the browser will first try to see if std:kv-storage is available; however, if that fails, it'll load /web_modules/kv-storage-polyfill.js instead.
So in code, if we import:
import { StorageArea } from '/web_modules/kv-storage-polyfill.js';
This is what will happen:
"/web_modules/kv-storage-polyfill.js": [ // when I'm requested "std:kv-storage", // try me first! "/web_modules/kv-storage-polyfill.js" // or fallback to me ]
🎉 Conclusion
And we should now have a simple, functioning PWA with minimal dependencies. There are a few nitpicks to this project that we could complain about, and they'd all likely be fair. For example, we probably could've gone without using Pika, but it does make life really easy for us. You could have made the same argument about adding a webpack configuration, but you'd have missed the point. The point here is to make a fun application, while using some of the latest features, drop some buzzwords, and have a low barrier for entry. As Fred Schott would say: "In 2019, you should use a bundler because you want to, not because you need to."
If you're interested in nitpicking, however, you can read this great discussion about using webpack vs. Pika vs. buildless, and you'll get some great insights from Sean Larkinn of the webpack core team himself, as well as Fred K. Schott, creator of Pika.
I hope you enjoyed this blog post, and I hope you learned something, or discovered some new interesting people to follow. There are lots of exciting developments happening in this space right now, and I hope I got you as excited about them as I am. If you have any questions, comments, feedback, or nitpicks, feel free to reach out to me on twitter at @passle_ or @openwc and don't forget to check out open-wc.org 😉.
Honorable Mentions
I'd like to give a few shout-outs to some very interesting people that are doing some great stuff, and you may want to keep an eye on.
Guy Bedford, who wrote es-module-shims, which, well, shims ES modules, and import maps. Which if you ask me is quite an amazing feat, and allows me to actually use some of these new technologies that aren't implemented on all browsers yet.
Luke Jackson's talk Don't Build That App! No webpack, no worries 🤓🤙, as Luke would say.
Thanks to Benny Powers and Lars den Bakker for their helpful comments and feedback.
The post Going Buildless appeared first on CSS-Tricks.
Going Buildless published first on https://deskbysnafu.tumblr.com/
0 notes
Text
Improve Your JavaScript Knowledge By Reading Source Code
Improve Your JavaScript Knowledge By Reading Source Code
Carl Mungazi
2019-07-12T12:30:59+02:002019-07-12T11:18:48+00:00
Do you remember the first time you dug deep into the source code of a library or framework you use frequently? For me, that moment came during my first job as a frontend developer three years ago.
We had just finished rewriting an internal legacy framework we used to create e-learning courses. At the beginning of the rewrite, we had spent time investigating a number of different solutions including Mithril, Inferno, Angular, React, Aurelia, Vue, and Polymer. As I was very much a beginner (I had just switched from journalism to web development), I remember feeling intimidated by the complexity of each framework and not understanding how each one worked.
My understanding grew when I began investigating our chosen framework, Mithril, in greater depth. Since then, my knowledge of JavaScript — and programming in general — has been greatly helped by the hours I have spent digging deep into the guts of the libraries I use daily either at work or in my own projects. In this post, I will share some of the ways you can take your favorite library or framework and use it as an educational tool.
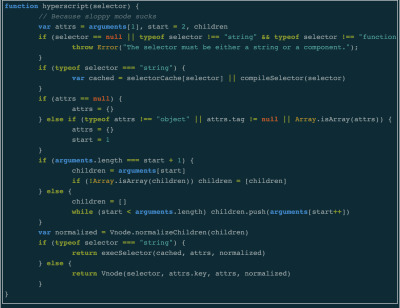
My first introduction to reading code was via Mithril’s hyperscript function. (Large preview)
The Benefits Of Reading Source Code
One of the major benefits of reading source code is the number of things you can learn. When I first looked into Mithril’s codebase, I had a vague idea of what the virtual DOM was. When I finished, I came away with the knowledge that the virtual DOM is a technique which involves creating a tree of objects that describe what your user interface should look like. That tree is then turned into DOM elements using DOM APIs such as document.createElement. Updates are performed by creating a new tree describing the future state of the user interface and then comparing it with objects from the old tree.
I had read about all of this in various articles and tutorials, and whilst it was helpful, being able to observe it at work in the context of an application we had shipped was very illuminating for me. It also taught me which questions to ask when comparing different frameworks. Instead of looking at GitHub stars, for example, I now knew to ask questions such as, “How does the way each framework performs updates affect performance and the user experience?”
Another benefit is an increase in your appreciation and understanding of good application architecture. Whilst most open-source projects generally follow the same structure with their repositories, each of them contains differences. Mithril’s structure is pretty flat and if you are familiar with its API, you can make educated guesses about the code in folders such as render, router and request. On the other hand, React’s structure reflects its new architecture. The maintainers have separated the module responsible for UI updates (react-reconciler) from the module responsible for rendering DOM elements (react-dom).
One of the benefits of this is that it is now easier for developers to write their own custom renderers by hooking into the react-reconciler package. Parcel, a module bundler I have been studying recently, also has a packages folder like React. The key module is named parcel-bundler and it contains the code responsible for creating bundles, spinning up the hot module server and the command-line tool.
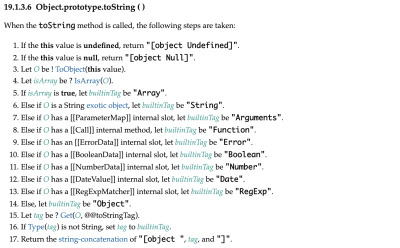
It will not be long before the source code you are reading leads you to the JavaScript specification. (Large preview)
Yet another benefit — which came as a welcome surprise to me — is you become more comfortable reading the official JavaScript specification which defines how the language works. The first time I read the spec was when I was investigating the difference between throw Error and throw new Error (spoiler alert — there is none). I looked into this because I noticed that Mithril used throw Error in the implementation of its m function and I wondered if there was a benefit to using it over throw new Error. Since then, I have also learnt that the logical operators && and || do not necessarily return booleans, found the rules which govern how the == equality operator coerces values and the reason Object.prototype.toString.call({}) returns '[object Object]'.
Techniques For Reading Source Code
There are many ways of approaching source code. I have found the easiest way to start is by selecting a method from your chosen library and documenting what happens when you call it. Do not document every single step but try to identify its overall flow and structure.
I did this recently with ReactDOM.render and consequently learned a lot about React Fiber and some of the reasons behind its implementation. Thankfully, as React is a popular framework, I came across a lot of articles written by other developers on the same issue and this sped up the process.
This deep dive also introduced me to the concepts of co-operative scheduling, the window.requestIdleCallback method and a real world example of linked lists (React handles updates by putting them in a queue which is a linked list of prioritised updates). When doing this, it is advisable to create a very basic application using the library. This makes it easier when debugging because you do not have to deal with the stack traces caused by other libraries.
If I am not doing an in-depth review, I will open up the /node_modules folder in a project I am working on or I will go to the GitHub repository. This usually happens when I come across a bug or interesting feature. When reading code on GitHub, make sure you are reading from the latest version. You can view the code from commits with the latest version tag by clicking the button used to change branches and select “tags”. Libraries and frameworks are forever undergoing changes so you do not want to learn about something which may be dropped in the next version.
Another less involved way of reading source code is what I like to call the ‘cursory glance’ method. Early on when I started reading code, I installed express.js, opened its /node_modules folder and went through its dependencies. If the README did not provide me with a satisfactory explanation, I read the source. Doing this led me to these interesting findings:
Express depends on two modules which both merge objects but do so in very different ways. merge-descriptors only adds properties directly found directly on the source object and it also merges non-enumerable properties whilst utils-merge only iterates over an object’s enumerable properties as well as those found in its prototype chain. merge-descriptors uses Object.getOwnPropertyNames() and Object.getOwnPropertyDescriptor() whilst utils-merge uses for..in;
The setprototypeof module provides a cross platform way of setting the prototype of an instantiated object;
escape-html is a 78-line module for escaping a string of content so it can be interpolated in HTML content.
Whilst the findings are not likely to be useful immediately, having a general understanding of the dependencies used by your library or framework is useful.
When it comes to debugging front-end code, your browser’s debugging tools are your best friend. Among other things, they allow you to stop the program at any time and inspect its state, skip a function’s execution or step into or out of it. Sometimes this will not be immediately possible because the code has been minified. I tend to unminify it and copy the unminified code into the relevant file in the /node_modules folder.
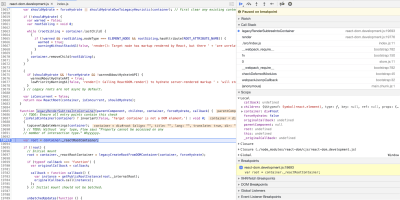
Approach debugging as you would any other application. Form a hypothesis and then test it. (Large preview)
Case Study: Redux’s Connect Function
React-Redux is a library used to manage the state of React applications. When dealing with popular libraries such as these, I start by searching for articles that have been written about its implementation. In doing so for this case study, I came across this article. This is another good thing about reading source code. The research phase usually leads you to informative articles such as this which only improve your own thinking and understanding.
connect is a React-Redux function which connects React components to an application’s Redux store. How? Well, according to the docs, it does the following:
“...returns a new, connected component class that wraps the component you passed in.”
After reading this, I would ask the following questions:
Do I know any patterns or concepts in which functions take an input and then return that same input wrapped with additional functionality?
If I know of any such patterns, how would I implement this based on the explanation given in the docs?
Usually, the next step would be to create a very basic example app which uses connect. However, on this occasion I opted to use the new React app we are building at Limejump because I wanted to understand connect within the context of an application which will eventually be going into a production environment.
The component I am focusing on looks like this:
class MarketContainer extends Component { // code omitted for brevity } const mapDispatchToProps = dispatch => { return { updateSummary: (summary, start, today) => dispatch(updateSummary(summary, start, today)) } } export default connect(null, mapDispatchToProps)(MarketContainer);
It is a container component which wraps four smaller connected components. One of the first things you come across in the file which exports connect method is this comment: connect is a facade over connectAdvanced. Without going far we have our first learning moment: an opportunity to observe the facade design pattern in action. At the end of the file we see that connect exports an invocation of a function called createConnect. Its parameters are a bunch of default values which have been destructured like this:
export function createConnect({ connectHOC = connectAdvanced, mapStateToPropsFactories = defaultMapStateToPropsFactories, mapDispatchToPropsFactories = defaultMapDispatchToPropsFactories, mergePropsFactories = defaultMergePropsFactories, selectorFactory = defaultSelectorFactory } = {})
Again, we come across another learning moment: exporting invoked functions and destructuring default function arguments. The destructuring part is a learning moment because had the code been written like this:
export function createConnect({ connectHOC = connectAdvanced, mapStateToPropsFactories = defaultMapStateToPropsFactories, mapDispatchToPropsFactories = defaultMapDispatchToPropsFactories, mergePropsFactories = defaultMergePropsFactories, selectorFactory = defaultSelectorFactory })
It would have resulted in this error Uncaught TypeError: Cannot destructure property 'connectHOC' of 'undefined' or 'null'. This is because the function has no default argument to fall back on.
Note: For more on this, you can read David Walsh’s article. Some learning moments may seem trivial, depending on your knowledge of the language, and so it might be better to focus on things you have not seen before or need to learn more about.
createConnect itself does nothing in its function body. It returns a function called connect, the one I used here:
export default connect(null, mapDispatchToProps)(MarketContainer)
It takes four arguments, all optional, and the first three arguments each go through a match function which helps define their behaviour according to whether the arguments are present and their value type. Now, because the second argument provided to match is one of three functions imported into connect, I have to decide which thread to follow.
There are learning moments with the proxy function used to wrap the first argument to connect if those arguments are functions, the isPlainObject utility used to check for plain objects or the warning module which reveals how you can set your debugger to break on all exceptions. After the match functions, we come to connectHOC, the function which takes our React component and connects it to Redux. It is another function invocation which returns wrapWithConnect, the function which actually handles connecting the component to the store.
Looking at connectHOC’s implementation, I can appreciate why it needs connect to hide its implementation details. It is the heart of React-Redux and contains logic which does not need to be exposed via connect. Even though I will end the deep dive here, had I continued, this would have been the perfect time to consult the reference material I found earlier as it contains an incredibly detailed explanation of the codebase.
Summary
Reading source code is difficult at first but as with anything, it becomes easier with time. The goal is not to understand everything but to come away with a different perspective and new knowledge. The key is to be deliberate about the entire process and intensely curious about everything.
For example, I found the isPlainObject function interesting because it uses this if (typeof obj !== 'object' || obj === null) return false to make sure the given argument is a plain object. When I first read its implementation, I wondered why it did not use Object.prototype.toString.call(opts) !== '[object Object]', which is less code and distinguishes between objects and object sub types such as the Date object. However, reading the next line revealed that in the extremely unlikely event that a developer using connect returns a Date object, for example, this will be handled by the Object.getPrototypeOf(obj) === null check.
Another bit of intrigue in isPlainObject is this code:
while (Object.getPrototypeOf(baseProto) !== null) { baseProto = Object.getPrototypeOf(baseProto) }
Some Google searching led me to this StackOverflow thread and the Redux issue explaining how that code handles cases such as checking against objects which originate from an iFrame.
Useful Links On Reading Source Code
“How To Reverse Engineer Frameworks,” Max Koretskyi, Medium
“How To Read Code,” Aria Stewart, GitHub

(dm, yk, il)
0 notes
Text
300+ TOP Framework7 Interview Questions and Answers
Framework7 Interview Questions for freshers experienced :-
1. What is Framework7? The Framework7 is a free and open-source mobile HTML framework. It is used to develop hybrid mobile apps or web apps for iOS and Android devices. It is compatible with other frameworks like also be like Angular, React. 2. In which year Framework7 was introduced? The Framework7 was introduced in 2014. Its latest version v3.1.1 was released on August 3, 2018, licensed under MIT. 3. What is the reason behind Framework7 popularity? The Framework7 is popular because of the following reasons: It facilitates you to develop apps for iOS and Android both. The learning curve for Framework7 is very easy. Framework7 has many pre-styled widgets/components. It has built-in helper libraries. 4. What are the main features of Framework7? Main features of Framework7: Framework7 is an open source framework, so it is free to use. Framework7 has easy and familiar jQuery syntax so you can learn it very easily. Framework7 has the built-in FastClick library, so it is very easy to control-click delay for touch UI's. Framework7 has built-in grid system layout for arranging your elements responsively. Framework7 dynamically loads the page from the template via flexible router API. 5. What are the advantages of Framework7? Advantages of Framework7: Framework7 is not dependent on any third party library. Framework7 has its custom DOM7 for DOM manipulation. Framework7 can also be used with Angular and React frameworks. Framework7 facilitates you to create apps once you know HTML, CSS, and some basic JavaScript. It supports faster development via Bower. It is easy to develop apps for iOS and Android without learning it. 6. What are the disadvantages of Framework7? Disadvantages of Framework7: Framework7 only supports platforms like iOS and Android. The online community support for Framework7 is not as broad as iOS and Andriod. 7. What are the several layouts for Framework7? Framework7 provides different types of layouts for your application. It supports mainly four types of Navbar/Toolbar layouts: Static Layout: The static layout is most often used layout type and includes navbar and toolbar which can be scrollable page content and each page contains its navbar and toolbar. Fixed Layout: Fixed layout uses its navbar and toolbar which can be visible on screen and cannot be scrollable on the page. Through Layout: In through layout, the navbar and toolbar appear fixed for all pages within a single view. Mixed Layout: This layout is a mix of all the above layouts in the single view. 8. What are Navbars in Framework7? There are three parts in navbars which may contain any HTML content in the following way: Left: It is designed to place backlink icons or single text link. Center: It is used to display the title of the page or tab links. Right: This part can be used similarly as left part. 9. What is the use of different navbars in Framework7? Following is a list of different navbars with details: Basic navbar: A basic navbar can be created by using the navbar, navbar-inner, left, center and right classes. Navbar with links: To use links in left and right part of your navbar, add tag with a class link. Multiple links: To use multiple links, add a few more to the part of your choice. Links with text and icons: The links can be provided with icons and text by adding classes for icons and wrapping the link text with the element. Links with only icons: Navbar links can be provided with only icons by adding icon-only class to links. Related app and view methods: On initializing the View, framework7 allows you to use methods available for the navbar. Hide navbar automatically: The navbar can be hidden/shown automatically for some Ajax loaded pages where a navbar is not required. 10. What are the toolbars in Framework7? Toolbars are used to provide easy access to other pages by using navigation elements at the bottom of the screen. 11. What are the different Framework7 toolbars to use? You can use toolbars in two ways as specified in the table. Hide Toolbar: If you want to hide the toolbar automatically when you load the pages, use the no-toolbar class to loaded page. Bottom Toolbar: Place the toolbar at the bottom of the page by using the toolbar-bottom class. 12. What are the different methods used with the toolbar? Following is a list of methods used with toolbars: myApp.hideToolbar(toolbar): It hides the specified toolbar. myApp.showToolbar(toolbar): It shows the specified toolbar. view.hideToolbar(): It hides the specified toolbar in the view. view.showToolbar(): It shows the specified toolbar in the view. 13. What is Search Bar in Framework 7? SearchBar is obtained in Framework 7 by using the SearchBar class. It is used for searching the elements. 14. What are the different SearchBar properties in framework 7? Following is a list of different SearchBar properties: mySearchbar.params: It represents the initialized parameters passed with an object. mySearchbar.query: It searches the current query. mySearchbar.searchList: It defines the search list block. mySearchbar.container: It defines the search bar container with HTML element. mySearchbar.input: It defines the search bar input with HTML element. mySearchbar.active: It defines whether the search bar is enabled or disabled. 15. What are the different SearchBar methods? Following is a list of SearchBar methods: mySearchbar.search(query): This method is used to search the passed query. mySearchbar.enable(): It is used to enable the search bar. mySearchbar.disable(): It is used to disable the search bar. mySearchbar.clear(): It facilitates you can clear the query and search results. mySearchbar.destroy(): It is used to destroy the search bar instance. 16. What do you mean by Content Block in Framework 7? In Framework 7, Content Blocks make you able to add extra content with a different format. It is generally used when you have much content of different types, and you have to put all on a page. For example: This is out side of content block!!! Sed ut perspiciatis unde omnis iste natus error sit voluptatem accusantium doloremque laudantium, totam rem aperiam, eaque ipsa quae ab illo inventore veritatis et quasi architecto beatae vitae dicta sunt explicabo. 17. What is Layout grid in Framework 7? The Framework7 provides different types of grid types for placing the content according to user needs. The layout grid is used to provide different types of columns size. 18. What do you know by Overlays in Framework 7? In Framework7, overlays are used to work with applications smoothly. Following is a list of some Overlays in Framework 7: Modal: Modal is a small window which is used to display content from separate sources without leaving the parent window. Popup: Popup is a popup box which is used to display the content when the user clicks on the element. Popover: It manages the presentation of the temporary content. Action Sheet: The Action Sheet is used to present the user with a set of possibilities for how to handle a given task. Login Screen: Overlay login screen displays login screen format which can be used in page or popup or as a standalone overlay. Picker Modal: Picker modal is used to pick some custom content which is similar to calendar picker. 19. What is the Progress Bar in Framework 7? The progress bars can be used to show the loading of assets or progress of a task to the users. The Progress bar can be specified by using the progress bar class. When the user doesn't know how long the loading processes the request, you can use progress bar-infinite class. 25% 50% 75% 100% For complete example: Click here. 20. What Is Accordion In Framework7? In Framework 7, the accordion is a graphical control element displayed as a stacked list of items. Each accordion can be expanded or stretched to reveal the content associated with that accordion. For complete example: Click here. 21. What are the different classes used for accordion in Framework 7? Following classes are used in Framework 7 accordion: accordion-list: It is an optional class contains the group of accordion items list. accordion-item: It is a required class for a single accordion item. accordion-item-toggle: It is a required class used to expand accordion item content. accordion-item-content: It is a required class used for hidden accordion item content. accordion-item-expanded: It is a single expanded accordion item. 22. What are the cards in Framework 7? The Framework 7 cards contain organized information related to a single subject like a photo, link, and text. Following is a list of Framework 7 card type: Card HTML Layout: The basic card HTML layout uses card classes to arrange its items. List View With Cards: You can use cards as list view elements by adding cards-list class to . 23. What is the use of the floating action button in Framework 7? The Framework7 Floating Action Button is used for promoted action. It is like a circled icon floating above the UI and has motion behaviors that include morphing, launching, and a transferring anchor point. There are 3 types of action buttons used in Framework7: Floating Action Button Layout: It is very simple. You have to place it as a child of page or view. Morph to Popover: If you want to open popover on clicking the floating action button, then you can use floating-button-to-popover class. Speed Dial: You can invoke related actions upon clicking the floating action button by using speed dial. 24. What are tabs in Framework 7? The Framework7 tabs are the set of logically grouped content that facilitates you to move between them and save the space like accordion quickly. Let's see the layout of a Framework7 tab: ... The content for Tab 1 goes here ... ... The content for Tab 2 goes here ... 25. What is the message bar in Framework 7? The Framework7 Message bar is a resizable toolbar for usage with messages. It provides a special resizable toolbar to work with the messaging system in the application. Syntax: Send 26. What is the picker in Framework 7? In Framework7, the picker is a very powerful component which facilitates you to choose any values from the list and also used to create custom overlay pickers. It looks like native iOS picker and can be used as an inline component or as an overlay. 27. What is the use of infinite scroll in Framework 7? The Infinite scroll is used when you want to load additional content and perform the required actions when the page is near to the bottom. Syntax ... Here: page-content infinite-scroll: It is used for infinite scroll container. data-distance: This attribute is used to configure distance from the bottom of a page (in px) to trigger infinite scroll event, and its default value is 50px. 28. What is the autocomplete in Framework 7? In Framework7, autocomplete is a mobile friendly and touch-optimized component, which can be a drop-down or in a standalone way. You can create and initialize Autocomplete instance by using the JavaScript method: myApp.autocomplete(parameters. Here, parameters are required objects used to initialize the Autocomplete instance. 29. How can we use the date functionality in Framework 7? The Framework7 provides Calender component which facilitates you to handle dates easily and can be used as an inline or as an overlay component. The overlay calendar converted to pop over on tablets automatically. myApp.autocomplete(parameters) Here, parameters are required objects used to initialize the Autocomplete instance. 30. What is hairline in Framework7? Hairline is a class. It is used to add 1px border around the images by using the border class. It contains the following rules: :after – This pseudo element is used for bottom and right hairlines. :before – This pseudo element is used for top and left hairlines. Framework7 Questions and Answers Pdf Download Read the full article
0 notes
Link
In this article, we'll take a look at the biggest and best JavaScript frameworks around, and explore how to get the best out of them for your next projects. We'll look at Vue.js, React, AngularJS, Polymer and Aurelia – you can use the drop-down menu above to jump to the framework you want to explore first.
Most of these frameworks are open source projects, too, so you can dig in and see how they work – or even contribute yourself.
Vue.js

Best for:
Beginners
Lightweight applications with a small footprint
Vue.js is a progressive JavaScript framework for building user interfaces. An open source project (see the GitHub repo here), its ideal for beginners. The main library is focused on the view layer and all templates are valid HTML, making it easy to pick up. In the following two mini-tutorials, we'll walk through how to use Vue to manage multiple data stores, and speed up the first load to improve your site's performance.
01. Manage state with Vue
As with any component-based library, managing state in Vue can be tricky. While the application is small, it’s possible to keep things in sync by emitting events when values change. However, this can become brittle and prone to errors as the application grows, so it may be better to start out with a more centralised solution.
If you’re familiar with Flux and Redux, Vuex works in much the same way. State is held in one centralised location and is linked to the main Vue application. Everything that happens within the application is reflected somewhere within that state. Components can select what information is relevant to them and be notified if it changes, much like if it was part of its internal state.
A Vuex store is made up of four things: the state, getters, mutations and actions. The state is a single object that holds all the necessary data for the entire application. The way this object gets structured depends on the project, but would typically hold at least one value for each view.
Getters work like computed properties do inside components. Their value is derived from the state and any parameters passed into it. They can be used to filter lists without having to duplicate that logic inside every component that uses that list.
The state cannot be edited directly. Any updates must be performed through mutation methods supplied inside the store. These are usually simple actions that perform one change at a time. Each mutation method receives the state as an argument, which is then updated with the values needed to change.
Mutations need to be synchronous in order for Vuex to understand what has changed. For asynchronous logic – like a server call – actions can be used instead. Actions can return Promises, which lets Vuex know that the result will change in the future as well as enabling developers to chain actions together.
To perform a mutation, they have to be committed to the store by calling commit()and passing the name of the mutation method required. Actions need to be dispatched in a similar way with dispatch().
It’s good practice to have actions commit mutations rather than commit them manually. That way, all updating logic is held together in the same place. Components can then dispatch the actions directly, so long as they are mapped using the mapActions() method supplied by Vuex.
To avoid overcomplicating things, the store can also be broken up into individual modules that look after their own slice of the state. Each module can register its own state, getters, mutations and actions. State is combined between each module and grouped by their module name, in much the same way as combineReducers() works within Redux.pport.
02. Explore lazy load routes
By default, the entire contents of the application end up inside one JavaScript file, which can result in a slow page load. A lot of that content is never used on the first screen the user visits. Instead it can be split off from the main bundle and loaded in as and when needed.
Vue makes this process incredibly simple to set up, as vue-router has built-in support for lazy loading.
Vue supports using dynamic imports to define components. These return Promises, which resolve to the component itself. The router can then use that component to render the page like normal. These work alongside code splitting built in to Webpack, which makes it possible to use features like magic comments to define how components should be split.
React

Best for:
Sites and applications with complex view logic
Quick prototypes with a low barrier to entry
Launched in 2013, React is maintained by Facebook and Instagram, alongside a community of developers. It's component-based and declarative, and you can also use it to power mobile apps via React Native.
Here, we'll explain how to keep your code clean by separating your concerns, move contents outside of the root component, and ensure errors don't destabilise your application.
Use container and presentational components
As with any project, it's important to keep a separation of concerns. All React applications start off simple. As they grow, it can be tempting to keep adding logic to the same few components. In theory, this simplifies things by reducing the number of moving parts. When problems arise, however, these large components become prone to errors that are difficult to debug.
React and JSX encourage the creation on multiple small components to keep things as simple as possible. While breaking the interface down into smaller chunks can help with organisation, having a further separation between how a component works and what it looks like provides greater flexibility.
Container and presentational components are special names given to this separation. The container's job is to manage state and deal with interfacing with other parts of the application such as Redux, while the presentational component deals solely with providing the interface.
A container component will often be in charge of a small section of the UI, like a tweet. It will hold all the workings of that component – from storing state, like the number of likes, to the methods required for interaction, such as a mechanism for liking that tweet.
If the application makes use of external libraries, include at this point. For example, Redux's connect method would provide the container with a way of dispatching actions to the store without worrying the presentational component.
Containers will never render their
own UI and will instead render
another component – the presentational component.
This component will be passed props that detail all the information needed to render the view. If it needs to provide interactivity, the container will then pass down methods for this as well, which can be called like any other method.
Having this separation encourages developers to keep things as simple
as possible. If a container is starting
to grow too large, it makes it easy
to break off into a smaller set
of components.
If the inner workings of a component, such as its state, needs to change, this technique allows the presentational component to remain unaffected. This also means this component can be used somewhere else in the application without needing to adjust how it functions. As long as it keeps getting served the same data it will continue to work.
Render with portals
React 16 introduced the ability to return lots of different types of data from a component. While previously it had to be either a single component or 'null', the latest version allows strings, numbers, arrays and a new concept called 'portals'.
The return value of a render() method decides what React displays, which is shown at that point in the component hierarchy. Portals allow React to render any of these return types outside of the component they were called from.
These can be other parts of the page completely separate from the main application. They still form part of React and work just the same as any component, but are able to reach outside of the normal confines of
the root container.
A typical use case of this technique would be to trigger modal windows. To get correct positioning, overlay
and accessibility requirements out
of a modal it ideally needs to sit as a direct descendant of the <body>. The problem is, the root of a single page application will likely take up that position. Components managing modals will either need to trigger something in the root component, or render it out of place.
Here the Modal component returns a portal. The create function for it takes two arguments – what needs to be rendered and where it should render it. The second parameter is a regular DOM node reference, rather than anything specific to React.
In this example, it references a <div> at the top of the DOM tree that is a sibling of the main app container. It is possible to target any node, visible or not, as with any JavaScript. To use it, another component can summon Modal just like any other component. It will
then display its contents in the targeted node.
Because React events are synthetic, they are capable of bubbling up from the portal contents to the containing component, rather than the DOM node they are rendered in. In the modal example, this means that
the summoning component can
also handle its state, such as its visibility or contents.
Establish error boundaries
Unhandled errors can cause havoc in a JavaScript application. Without catching them as they happen, methods can stop executing half way. This can cause unpredictable behaviour if the user continues and is a bad experience all around.
Previous versions of React did not cope with these situations well. If an error occurred in a nested component, it would leave its parents in limbo. The component state object would be stuck in the middle of performing an operation that could end up locking up the interface.
As of version 16, the way React handles errors has changed. Now an error inside any component would unmount the entire application. While that would stop issues arising with an unstable state, it doesn't lend itself well to a good user experience.
To avoid this, we can create a special component called an error boundary to ring-fence parts of the application from the rest. Any errors that happen inside children of the boundary will not cause issues to those outside of it.
Error boundaries work a lot like typical catch blocks in JavaScript. When an error occurs somewhere inside the component tree, it will be caught by the componentDidCatch() method, which receives the error thrown along with a stack trace. When that gets called it is an opportunity to replace the tree with a fresh interface – typically an error message.
Since it only renders its children, this component
can wrap others
to catch any errors that happen within it. The components chosen for this will vary by application, but error boundaries can be placed wherever they are needed, including inside other boundaries.
Error boundary components shouldn't be too complicated. If an error occurs inside of a boundary, it will bubble up to the next boundary up. Failing that, it will unmount the whole application as usual.
AngularJS

Best for:
Large projects in need of structure
Applications with lots of changing data
AngularJS is an open source frontend web application framework developed by Google. It offers declarative templates with data-binding, MVW, MVVM, MVC, and dependency injection, all implemented using pure client-side JavaScript.
Here, we'll show you how to use AngularJS to create reusable code blocks known as custom decorators, serve content to your users quicker, and create performant and easy to control animations with ease.
Create custom decorators
TypeScript is a superset that sits on top of JavaScript. It supplies features such as static typing, classes and interfaces that are lacking in the native language. This means that when creating large applications developers can get feedback on how best to work with external code and avoid unnecessary bugs.
Angular is built exclusively on top of TypeScript, so it is important to understand how to utilise it correctly. Combining the strengths of both provides a solid foundation for the application as it grows. There are not many better techniques to demonstrate this than with decorators.
Decorators are special functions designed to supply behaviour to whatever it is applied to. Angular makes extensive use of them to provide hints to the compiler, like with @Component on classes or @Input on properties.
The aim is to make these functions as reusable as possible and are often used to provide utility functions, such as logging. In the example above, @ClassLogger is supplied to a component to log to the console when certain lifecycle hooks are fired. This could be applied to any component to track its behaviour.
The ClassLogger example above returns a function, which enables us
to customise the behaviour of the decorator as it is created. This is known as the decorator factory pattern, which is used by Angular
to create its own decorators.
To apply a decorator, it needs to be positioned just before what it is decorating. Because of the way they are designed, decorators can be stacked on top of each other, including Angular's own. TypeScript will chain these decorators together and combine their behaviours.
Decorators are not just limited to classes. They can be applied to properties, methods and parameters inside of them as well. All of these follow similar patterns, but are slightly different in their implementations.
This is an example of a plain method decorator. These take three arguments – the object targeted, the name of the method, and the descriptor that provides details on its implementation. By hooking into the value of that descriptor we can replace the behaviour of the method based on
the needs of the decorator.
Build platform-level animations
Animations are a great way to introduce a friendly side to an interface. But trying to control animations in JavaScript can be problematic. Adjusting dimensions like height is bad for performance, while toggling classes
can quickly get confusing. The Web Animations API is a good approach, but working with it inside Angular can be tricky.
Angular provides a module that enables components to be animated by integrating with the properties already within the class. It uses a syntax similar to CSS-based animations, which gets passed in as component metadata.
Each animation is defined by a 'trigger' – a grouping of states and transition effects. Each state is a string value that, when matched, applies the associated styles to the element. The transition values define different ways the element should move between those states. In this example, once the value bound to hidden evaluates to true, the element will shrink out of view.
Two other special states are also defined: void and *. The void state relates to a component that was not in the view at the time and can be used to animate it in or out. The wildcard * will match with any state and could be used to provide a dimming effect while any transition occurs.
Inside the template, the trigger is bound to a value within the component that represents the state. As that value changes, as does the state of the animation.
That bound value can be supplied either as a plain property or as the output of a method, but the result needs to evaluate into a string that can be matched against an animation state.
These animations also provide callbacks such as when they start
or stop. This can be useful for removing components that are
no longer visible.
Serve content quicker with server rendering
HTML parsers struggle with JavaScript frameworks. Web crawlers are often not sophisticated enough to understand how Angular works, so they only see a single, blank element and not the whole application.
By rendering the application on the server, it sends down an initial view for the users to look at while Angular and the rest of the functionality downloads in the background. Once the application arrives, it silently picks up from where the server left off.
The tools needed to achieve this in Angular are now a native part of the platform as of version 4. With a bit of set up, any application can be server rendered with just a few tweaks.
Both server and browser builds need their own modules, but share a lot of common logic. Both need a special version of BrowserModule, which allows Angular to replace the contents on-screen when it loads in. The server also needs ServerModule to generate the appropriate HTML.
Servers also need their own entry points where they can bootstrap their unique behaviours as necessary. That behaviour depends on the app, but will also likely mirror much of the main browser entry point.
If using the CLI, that also needs to be aware of how to build the project for the server by pointing to the new entry point. This can be triggered by using the "--app" flag when building
for the server.
The application is now ready to be server rendered. Implementations will vary based on the server technology used, but the base principles remain the same. For example, Angular provide an Express engine for Node, which can be used to populate the index page based on the request sent. All the server needs to do is serve that file. Server rendering is a complex subject with many edge cases (look here for more information).
Polymer

Best for:
Combining with other platforms and frameworks
Working with JavaScript standards
Polymer is a lightweight library designed to help you take full advantage of Web Components. Read on to find out how to use it to create pain-free forms, bundle your components to keep requests low and sizes small, and finally how to upgrade to the latest Polymer release: 3.0.
Work with forms
Custom elements are part of the browser. Once they are set up they work like any native element would do on the page. Most of the time, Polymer is just bridging the gap between now and what custom elements will be capable of in the future, along with bringing features like data binding.
One place where custom elements shine is their use as form inputs. Native input types in browsers are limited at best, but provide a reliable way of sending data. In cases where a suitable input isn't available – such as in an autocomplete field, for example – then custom elements can provide a suitable drop-in solution.
As their work is performed within the shadow DOM, however, custom input values will not get submitted alongside regular form elements like usual. Browsers will just skip over them without looking at their contents.
One way around this is to use an <iron-form> component, which is provided by the Polymer team. This component wraps around an existing form and will find any values either as a native input or custom element. Provided a component exposes a form value somewhere within the element, it will be detected and sent like usual.
In cases where a custom element does not expose an input, it's still possible to use that element within a form, provided it exposes a property that can be bound to.
If <my-input> exposes a property like "value" to hook into we can pull that value out as part of a two-way binding. The value can then be read out into a separate hidden input as part of the main form. It can be transformed at this point into a string to make it suitable for form transmission. Forms not managed by Polymer that would need to make use of these bindings, the Polymer team also provide a <dom-bind>component to automatically bind these values.
Bundle components
One of Polymer's biggest advantages is that components can be imported and used without any need for a build process. As optimised as these imports may be, each component requires a fresh request, which slows things down. While HTTP/2 would speed things up in newer browsers, those who do not support it will have a severely degraded experience. For those users, files should be bundled together.
If a project is set up using the Polymer CLI, bundling is already built in to the project. By running polymer build, the tool will collect all components throughout the project and inline any subcomponents they use.
This cuts down on requests, removes unnecessary comments and minifies to reduce the file size. It also has the added benefit of creating separate bundles for both ES5 and ES2015 to support all browsers.
Outside of Polymer CLI, applications can still be bundled using the separate Polymer Bundler library. This works much like the CLI, but is more of a manual process. By supplying a component, it will sift through the imports of the file,
inline their contents, and output a bundled file.
Polymer Bundler has a few separate options to customise the output. For example, developers can choose to keep comments or only inline specific components.
Upgrade to Polymer 3.0
The philosophy behind Polymer is to 'use the platform': instead of fighting against browser features, work with them to make the experience better for everyone. HTML imports are a key part of Polymer 2, but are being removed from the web components specification moving forward.
Polymer 3.0 changes the way that components are written to work with more established standards. While no breaking changes are made with the framework itself, it's important
to know how the syntax changes
in this new version.
First thing to note is that Polymer is migrating away from Bower as a package manager. To keep up with the way developers work, npm will become the home of Polymer, as well as any related components in the future.
To avoid using HTML imports, components are imported as JavaScript modules using the existing standardised syntax.
The major difference inside a component is that the class is now exported directly. This enables the module import <script> tag to
work correctly. Any other components can be included by using ES2015 import statements within this file.
Finally, templates have been moved into the class and work
with template literals. A project by the Polymer team called lit-html is working to provide the same flexibility as <template> tags
along with the efficiency of
selective DOM manipulation.
Aurelia

Best for:
Simple applications with
little setup
Developing alongside
web standards
Aurelia is a JavaScript client framework for web, mobile and desktop. It's written with next-gen ECMAScript, integrates with Web Components and has no external dependencies.
Read on for two mini-tutorials, showing you how to change how properties display value and function, and how to use Aurelia to check values in forms.
01. Use value converters
Sometimes, when developing components, the values being stored do not lend themselves well to being displayed in a view. A Date object, for example, has an unhelpful value when converted to a string, which requires developers to make special conversion methods just to show values correctly.
To get around this problem, Aurelia provides a mechanism to use classes to change values, known as value converters. These can take any kind of value, apply some kind of processing to it, and output that changed value in place of the original.
They work similar to pipes in Angular or filters in template languages like Twig.
Most will be one way – from the model to the view. But they can also work the other way. The same logic applies, but by using fromView instead of toView, values can be adjusted before they are returned back to the model.
A good use-case for this would be to format user input directly from the bind on the element. In this example, it will capitalise every word that is entered, which may be useful for a naming field.
They can also be chained together, which encourages the creation of composable converters that can have different uses across the application. One converter could filter an array of values, which then passes to another that sorts them.
Converters can also be given simple arguments that can alter the way they behave. Instead of creating different converters to perform similar filtering, create one that takes the type of filter to be performed as an argument. While only one argument is allowed, they can be chained together to achieve the same effect.
02. Try framework-level form validation
Validation is an important part of any application. Users need to be putting the correct information into forms for everything to work correctly. If they do not, they should be warned of the fact as early as possible.
While validation can often be a tricky process, Aurelia has support for validating properties built right into the framework. As long as form values are bound to class properties, Aurelia can check that they are correct whenever it makes sense to the application.
Aurelia provides a ValidationController, which takes instructions from the class, looks over the associated properties and supplies the template with any checks that have failed.
Each controller requires a single ValidationRules class that defines what's to be checked. These are all chained together, which enables the controller to logically flow through the checks dependant on the options that are passed.
Each ruleset begins with a call to ensure(), which takes the name of
the property being checked. Any commands that follow will apply
to that property.
Next are the rules. There are plenty of built-in options like required() or email() that cover common scenarios. Anything else can use satisfies(), which takes a function that returns either a Boolean or a Promise that passes or fails the check.
After the rules come any customisations of that check, for example the error message to display. Rules provide default messages, but these can be overridden if necessary.
Finally, calling on() applies the ruleset to the class specified. If it is being defined from within the constructor of the class, it can be called with this instead.
By default, validation will be fired whenever a bound property's input element is blurred. This can be changed to happen either when the property changes, or it can be triggered manually.
0 notes
Text
Using Preact as a React Alternative
Preact is an implementation of the virtual DOM component paradigm just like React and many other similar libraries. Unlike React, it’s only 3KB in size, and it also outperforms it in terms of speed. It’s created by Jason Miller and available under the well-known permissive and open-source MIT license.
Why Use Preact?
Preact is a lightweight version of React. You may prefer to use Preact as a lightweight alternative if you like building views with React but performance, speed and size are a priority for you — for example, in the case of mobile web apps or progressive web apps.
Whether you’re starting a new project or developing an existing one, Preact can save you a lot of time. You don’t need to reinvent the wheel trying to learn a new library, since it’s similar to, and compatible with, React — to the point that you can use existing React packages with it with only some aliasing, thanks to the compatibility layer preact-compat.
Pros and Cons
There are many differences between React and Preact that we can summarize in three points:
Features and API: Preact includes only a subset of the React API, and not all available features in React.
Size: Preact is much smaller than React.
Performance: Preact is faster than React.
Every library out there has its own set of pros and cons, and only your priorities can help you decide which library is a good fit for your next project. In this section, I’ll try to list the pros and cons of the two libraries.
Preact Pros
Preact is lightweight, smaller (only 3KB in size when gzipped) and faster than React (see these tests). You can also run performance tests in your browser via this link.
Preact is largely compatible with React, and has the same ES6 API as React, which makes it dead easy either to adopt Preact as a new library for building user interfaces in your project or to swap React with Preact for an existing project for performance reasons.
It has good documentation and examples available from the official website.
It has a powerful and official CLI for quickly creating new Preact projects, without the hassle of Webpack and Babel configuration.
Many features are inspired by all the work already done on React.
It has also its own set of advanced features independent from React, like Linked State.
React Pros
React supports one-way data binding.
It’s backed by a large company, Facebook.
Good documentation, examples, and tutorials on the official website and the web.
Large community.
Used on Facebook’s website, which has millions of visitors worldwide.
Has its own official developer debugging tools extension for Chrome.
It has the Create React App project boilerplate for quickly creating projects with zero configuration.
It has a well-architectured and complex codebase.
React Cons
React has a relatively large size in comparison with Preact or other existing similar libraries. (React minified source file is around 136KB in size, or about 42KB when minified and gzipped.)
It’s slower than Preact.
As a result of its complex codebase, it’s harder for novice developers to contribute.
Note: Another con I listed while writing this article was that React had a grant patent clause paired with the BSD license, making it legally unsuitable for some use cases. However, in September 2017, the React license switched MIT, which resolved these license concerns.
Preact Cons
Preact supports only stateless functional components and ES6 class-based component definition, so there’s no createClass.
No support for context.
No support for React propTypes.
Smaller community than React.
Getting Started with Preact CLI
Preact CLI is a command line tool created by Preact’s author, Jason Miller. It makes it very easy to create a new Preact project without getting bogged down with configuration complexities, so let’s start by installing it.
Open your terminal (Linux or macOS) or command prompt (Windows), then run the following commands:
npm i -g preact-cli@latest
This will install the latest version of Preact CLI, assuming you have Node and NPM installed on your local development machine.
You can now create your project with this:
preact create my-app
Or with this, ff you want to create your app interactively:
preact init
Next, navigate inside your app’s root folder and run this:
npm start
This will start a live-reload development server.
Finally, when you finish developing your app, you can build a production release using this:
npm run build
Demystifying Your First Preact App
After successfully installing the Preact CLI and generating an app, let’s try to understand the simple app generated with the Preact CLI.
The Preact CLI generates the following directory structure
├── node_modules ├── package.json ├── package-lock.json └── src ├── assets ├── components │ ├── app.js │ └── header ├── index.js ├── lib ├── manifest.json ├── routes │ ├── home │ └── profile └── style └── index.css
The components folder holds Preact components, and the routes folder holds the page components used for each app’s route. You can use the lib folder for any external libraries, the style folder for CSS styles, and the assets for icons and other graphics.
Note the manifest.json file, which is like package.json but for PWAs (progressive web apps). Thanks to the Preact CLI, you can have a perfect-score PWA out of the box.
Now, if you open your project’s package.json file, you’ll see that the main entry point is set to src/index.js. Here is the content of this file:
import './style'; import App from './components/app'; export default App;
As you can see, index.js imports styles, and App component from ./components/app**, and then just exports it as the default.
Now, let’s see what’s inside ./components/app:
import h, Component from 'preact'; import Router from 'preact-router'; import Header from './header'; import Home from '../routes/home'; import Profile from '../routes/profile'; export default class App extends Component handleRoute = e => this.currentUrl = e.url; ; render() return ( <div id="app"> <Header /> <Router onChange=this.handleRoute> <Home path="/" /> <Profile path="/profile/" user="me" /> <Profile path="/profile/:user" /> </Router> </div> );
This file exports a default class App which extends the Component class imported from the preact package. Every Preact component needs to extend the Component class.
App defines a render method, which returns a bunch of HTML elements and Preact components that render the app’s main user interface.
Inside the div element, we have two Preact components, Header — which renders the app’s header — and a Router component.
The Preact Router is similar to the latest version of React Router (version 4). You simply need to wrap the child components with a <Router> component, then specify the path prop for each component. Then, the router will take care of rendering the component, which has a path prop that matches the current browser’s URL.
It’s worth mentioning that Preact Router is very simple and, unlike React Router, it doesn’t support advanced features such as nested routes and view composition. If you need these features, you have to use either the React Router v3 by aliasing preact-compat, or better yet use the latest React Router (version 4) which is more powerful than v3 and doesn’t need any compatibility layer, because it works directly with Preact. (See this CodePen demo for an example.)
Preact Compatibility Layer
The preact-compat module allows developers to switch from React to Preact without changing imports from React and ReactDOM to Preact, or to use existing React packages with Preact.
Using preact-compat is easy. All you have to do is to first install it via npm:
npm i -S preact preact-compat
Then set up your build system to redirect imports or requires for react or react-dom to preact-compat. For example, in the case of Webpack, you just need to add the following configuration to webpack.config.js:
"resolve": "alias": "react": "preact-compat", "react-dom": "preact-compat"
Recommended Courses
Wes Bos
A step-by-step training course to get you building real world React.js + Firebase apps and website components in a couple of afternoons. Use coupon code ‘SITEPOINT’ at checkout to get 25% off.
Conclusion
Preact is a nice alternative to React. Its community is growing steadily, and more web apps are using it. So if you’re building a web app with high-performance requirements, or a mobile app for slow 2G networks, then you should consider Preact — either as the first candidate view library for your project, or as a drop-in replacement for React.
Ahmed is a web entrepreneur, developer, digital marketer and blogger. He writes about software and website development, money-making tips, SEO and more. You can find more of his writing on his
Techiediaries
site.
via JavaScript – SitePoint http://ift.tt/2xPyT3k
Via https://reactsharing.com/using-preact-react-alternative.html
0 notes